
Presentation program
Hits: 52

1. ENTRY TO THE PROGRAM
Enter the username and password and press the SING IN key
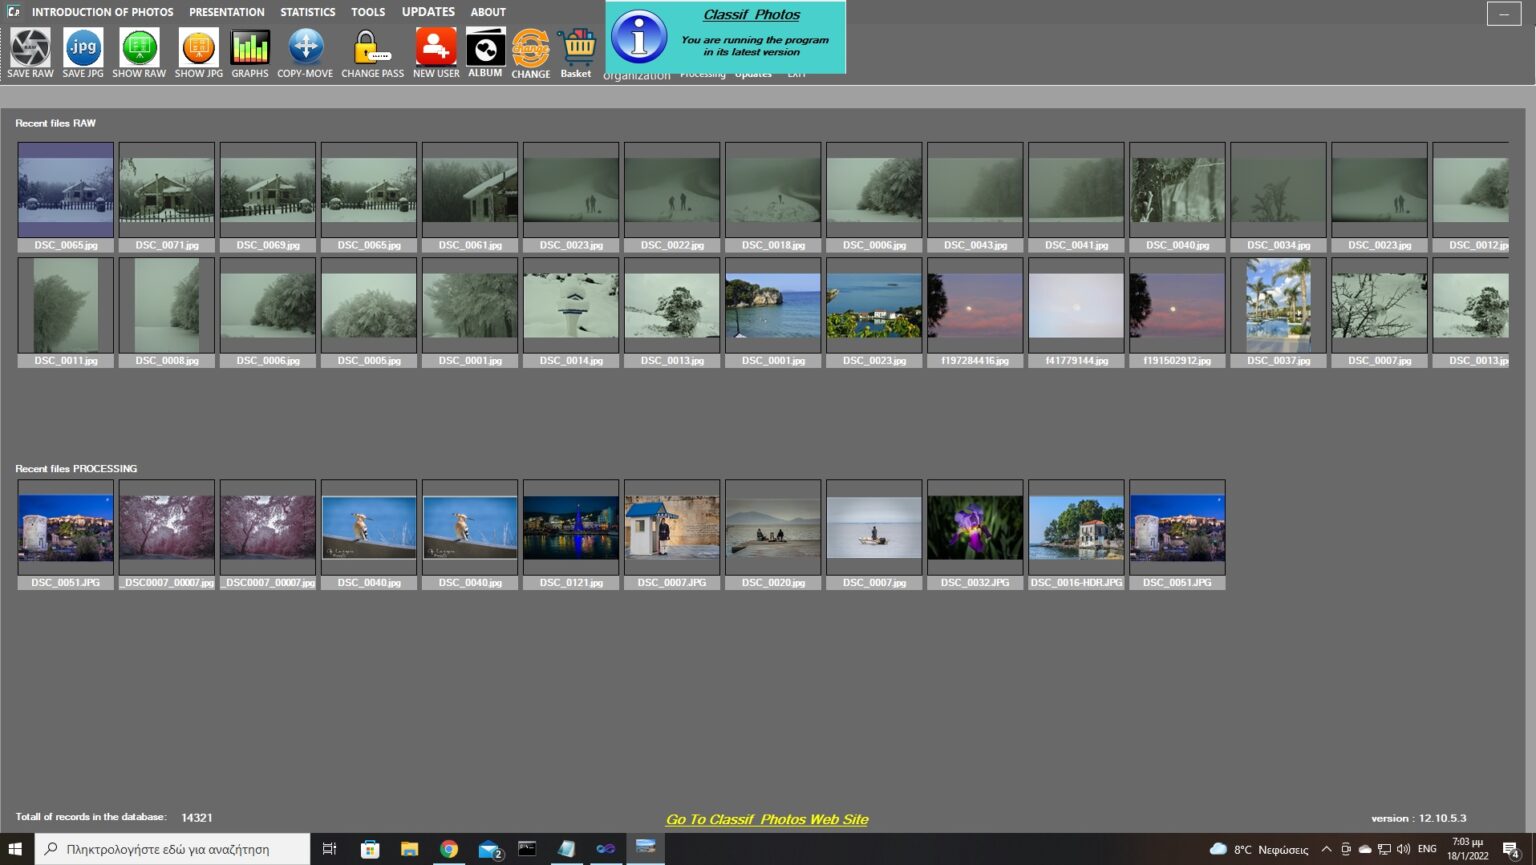
2.HOME PROGRAM SCREEN
From this screen we select the tasks we can do, either from the drop-down menu or from the icon shortcuts. The program checks for any new updates and informs us through a pop-up window
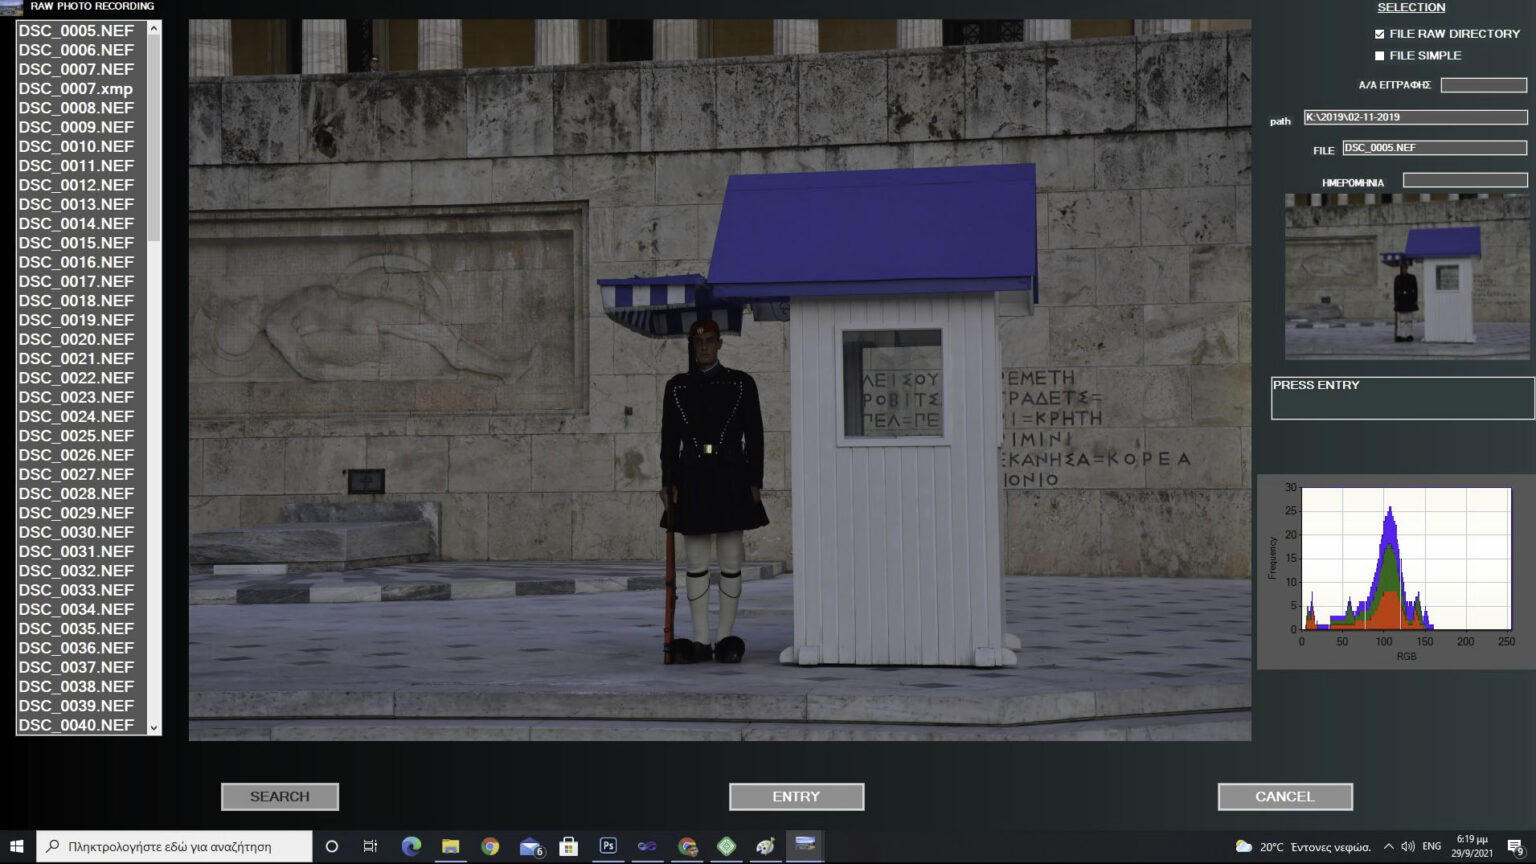
3.INTRODUCTION OF RAW PHOTOGRAPHS
We have the ability to select the entire directory or individual file by checking the corresponding option. By clicking on the box labeled path, select the directory or file from the pop-up window. The files or the archive are searched and presented in the left column. You are automatically presented with the first image, as well as its thumbnail and its RGB histogram
4.INTRODUCTION OF RAW PHOTOGRAPHS
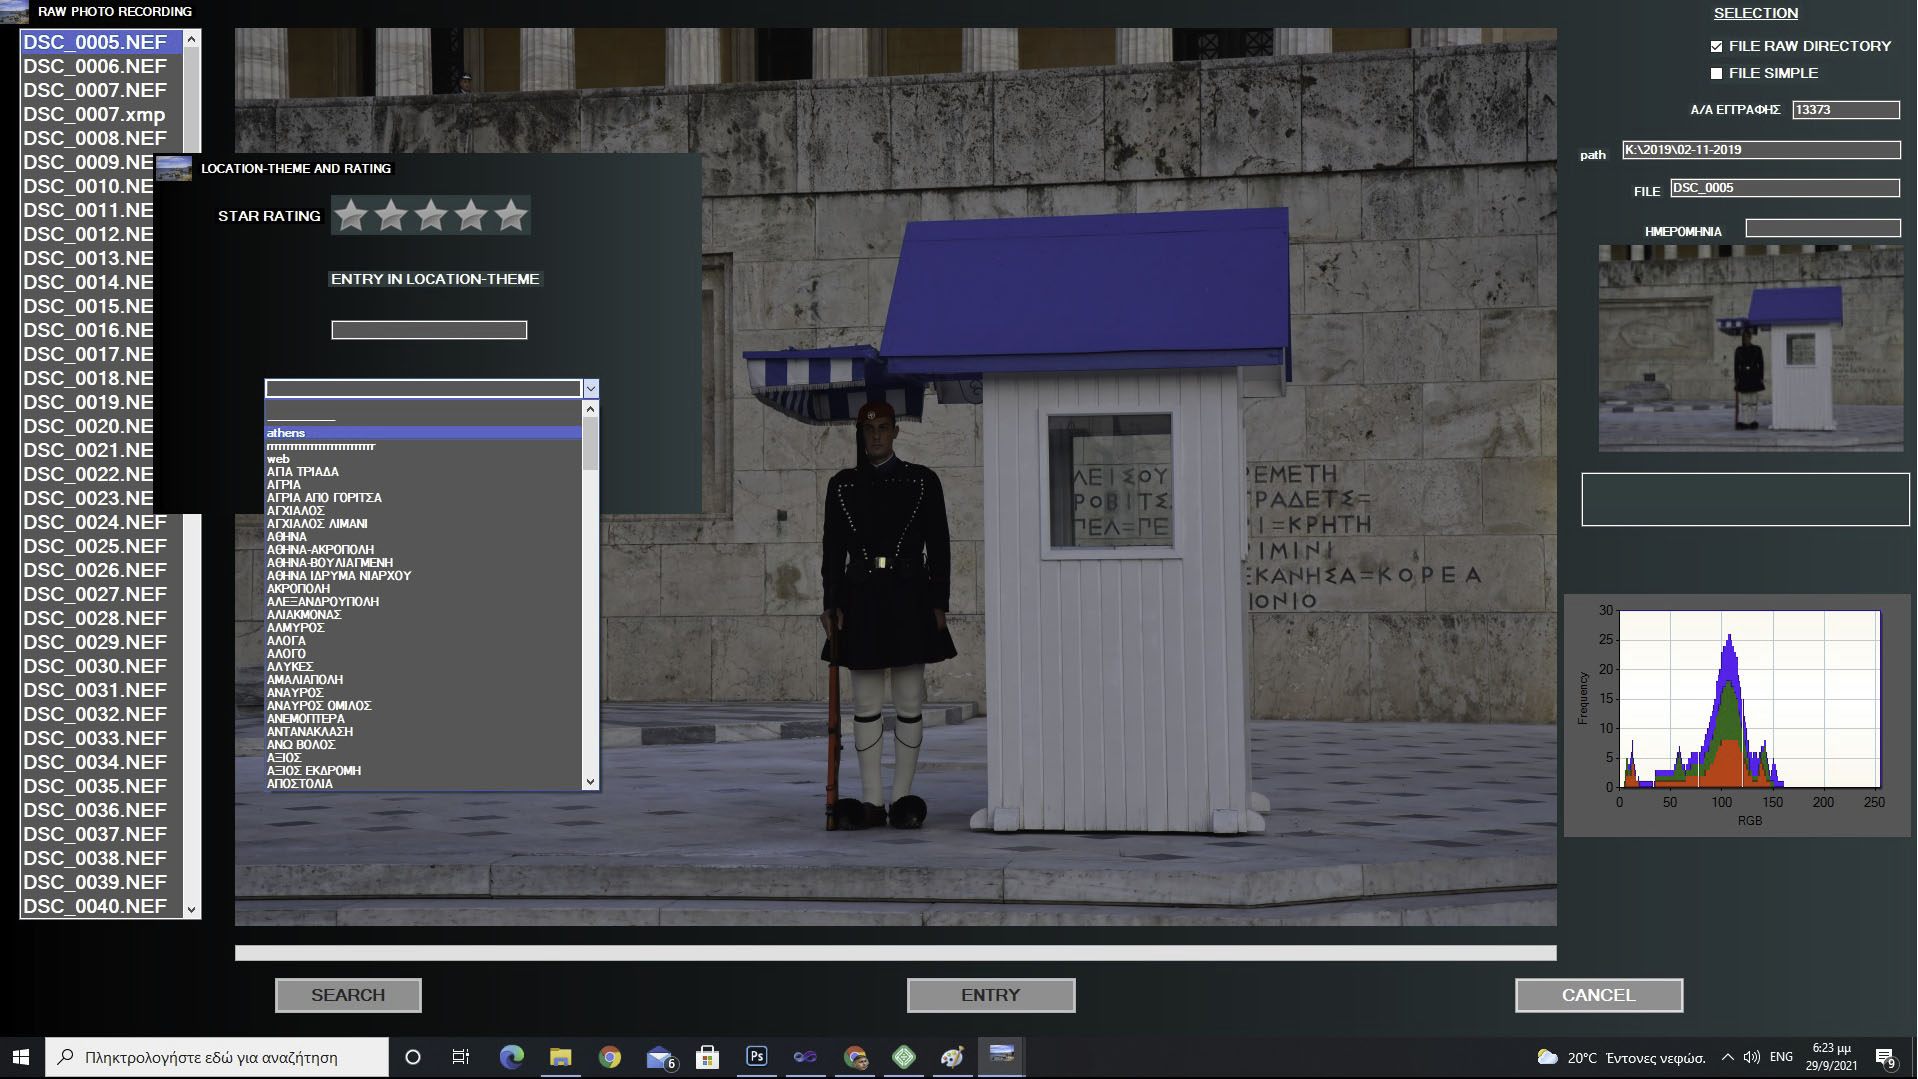
By pressing the ENTRY key in the pop-up window we select the evaluation of the photo as well as the location - subject from the drop-down menu. If it does not exist in the drop-down menu, write it in the box. Click OK and enter the data in the database and you will automatically prepare the next one.
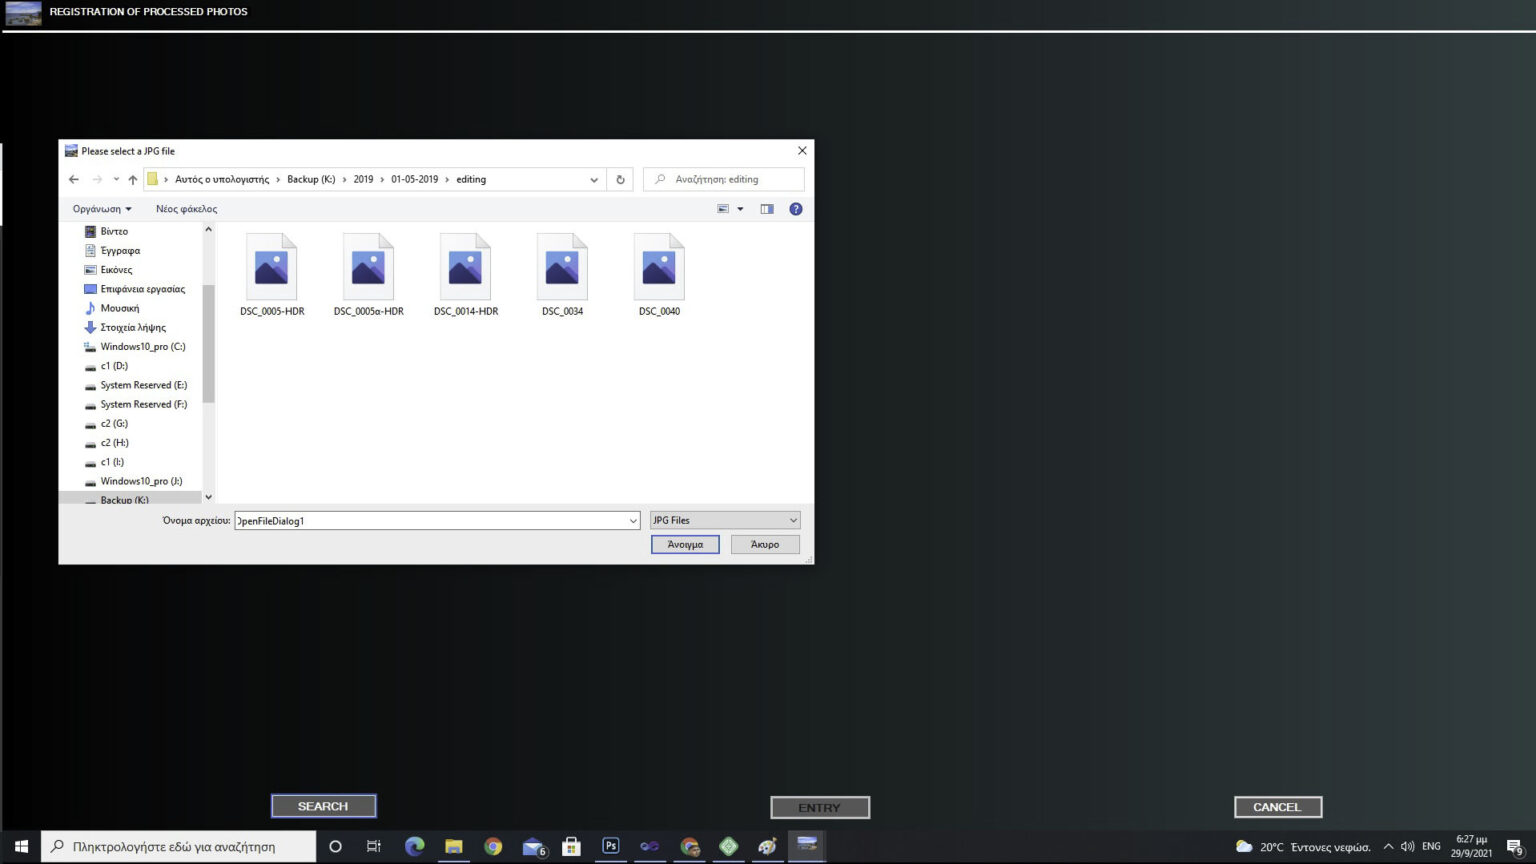
5.INTRODUCTION OF PROCESSED PHOTOGRAPHS
Pressing the SEARGE key in the pop-up window selects the edited .JPG photo
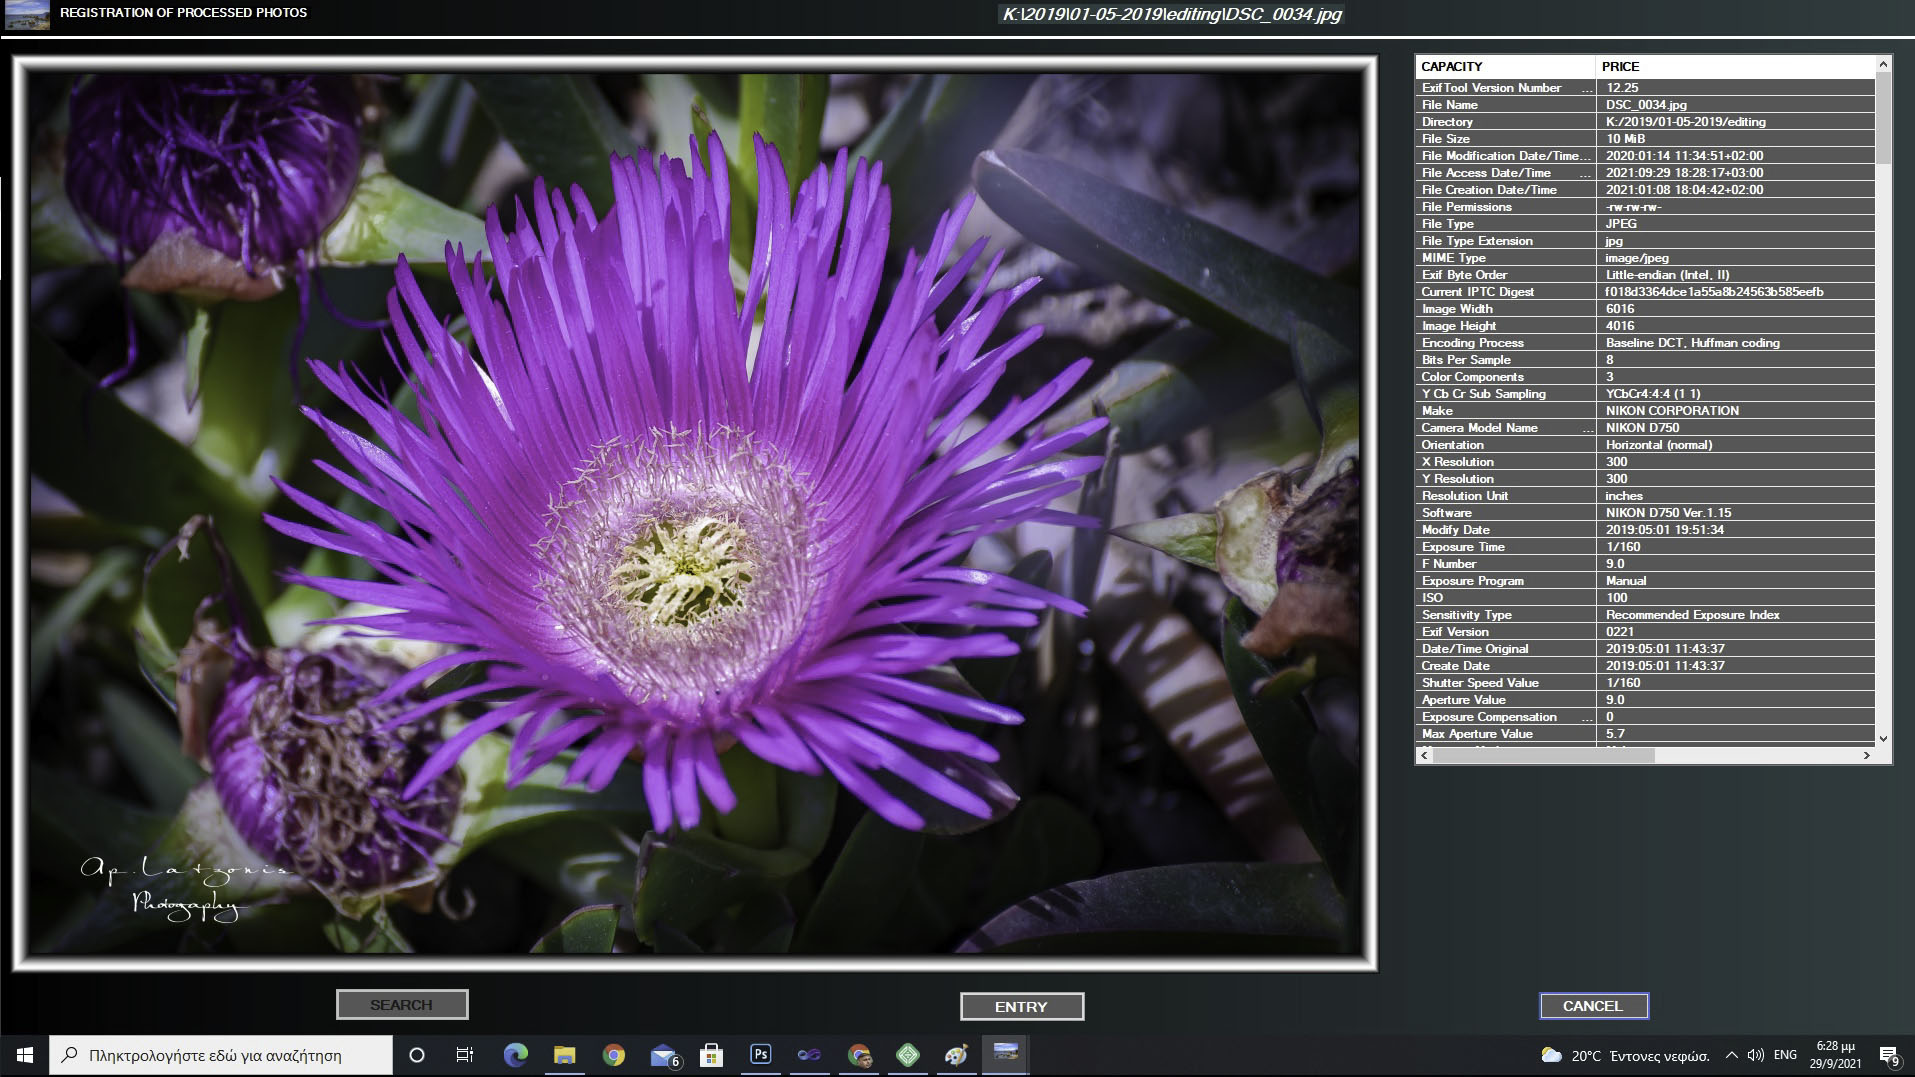
6.INTRODUCTION OF PROCESSED PHOTOGRAPHS
The photo is displayed in the image window. Selected metadata of the photo is displayed in the right column. Press ENTRY
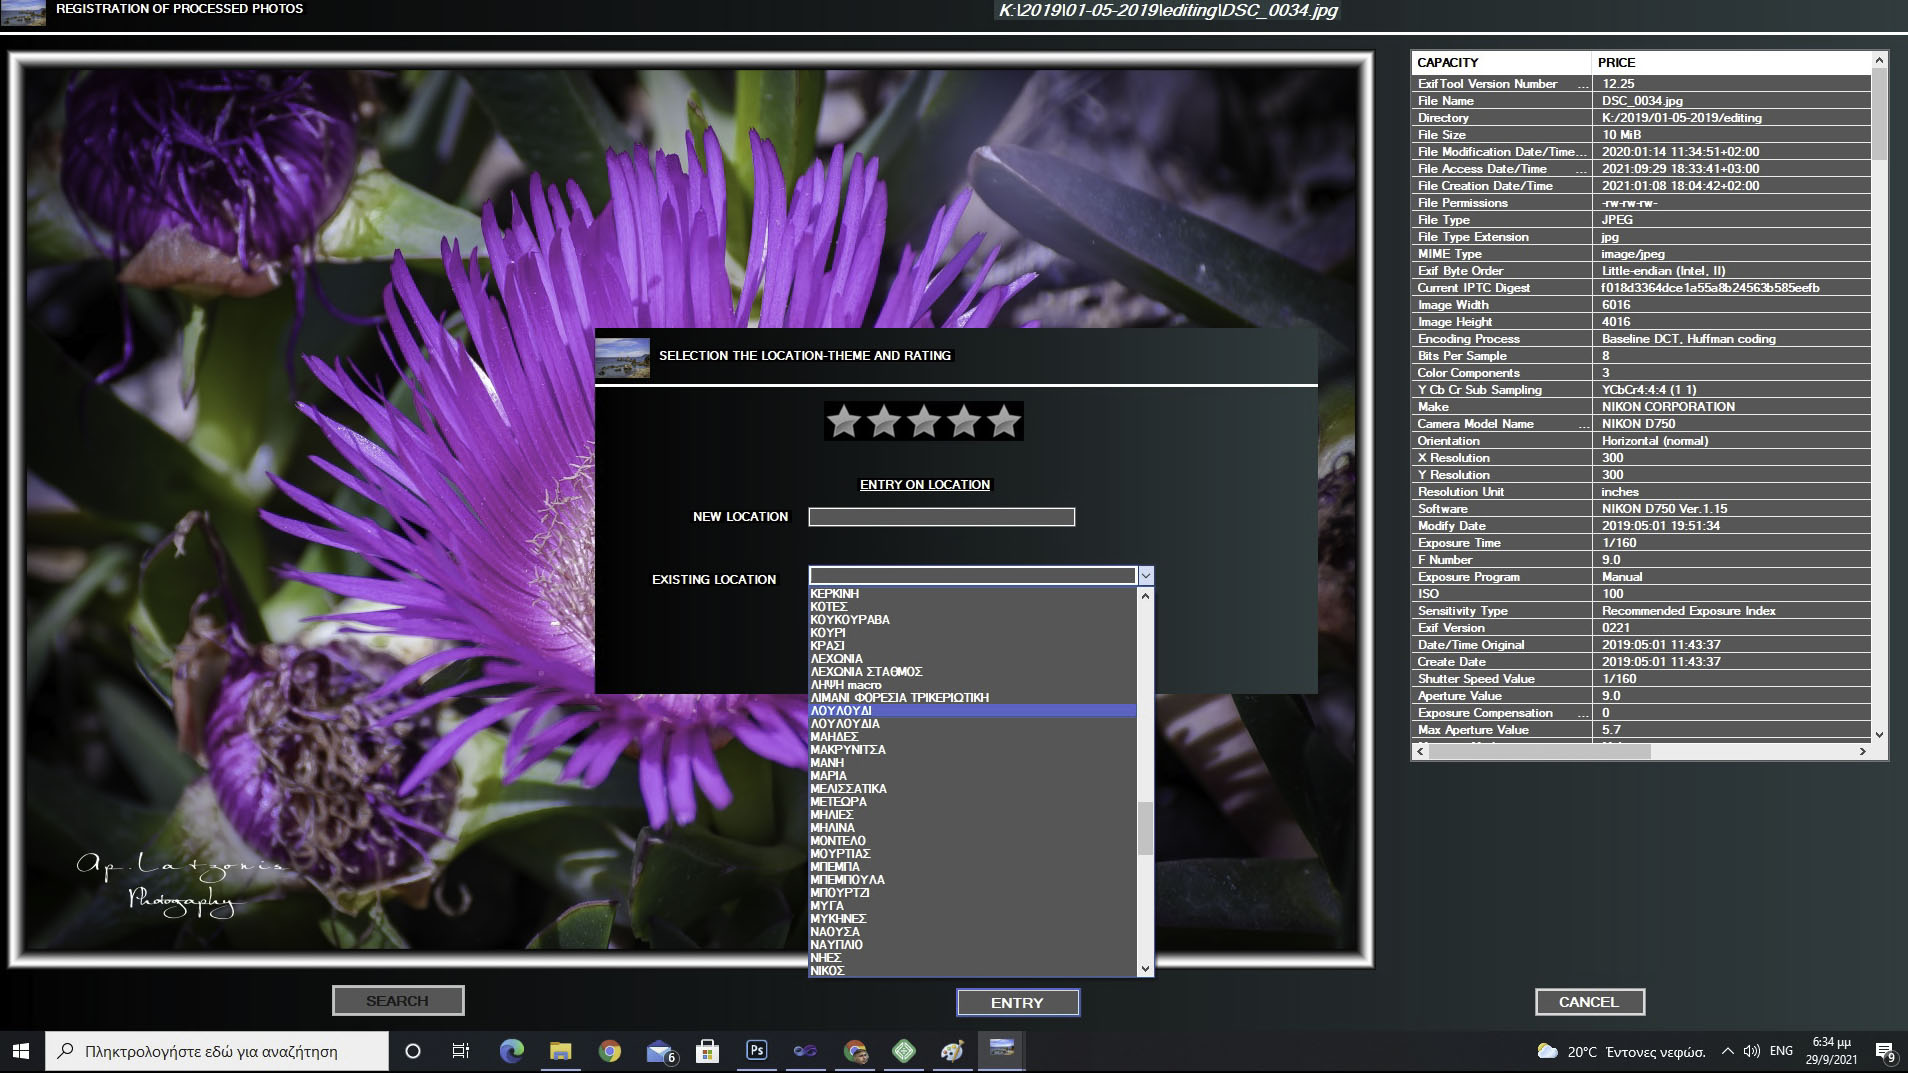
7.INTRODUCTION OF PROCESSED PHOTOGRAPHS
In the pop-up window we select the evaluation of the photo as well as the location - theme either from the drop-down menu if it is registered or by writing in the box above. Pressing SELECT was entered into the database.
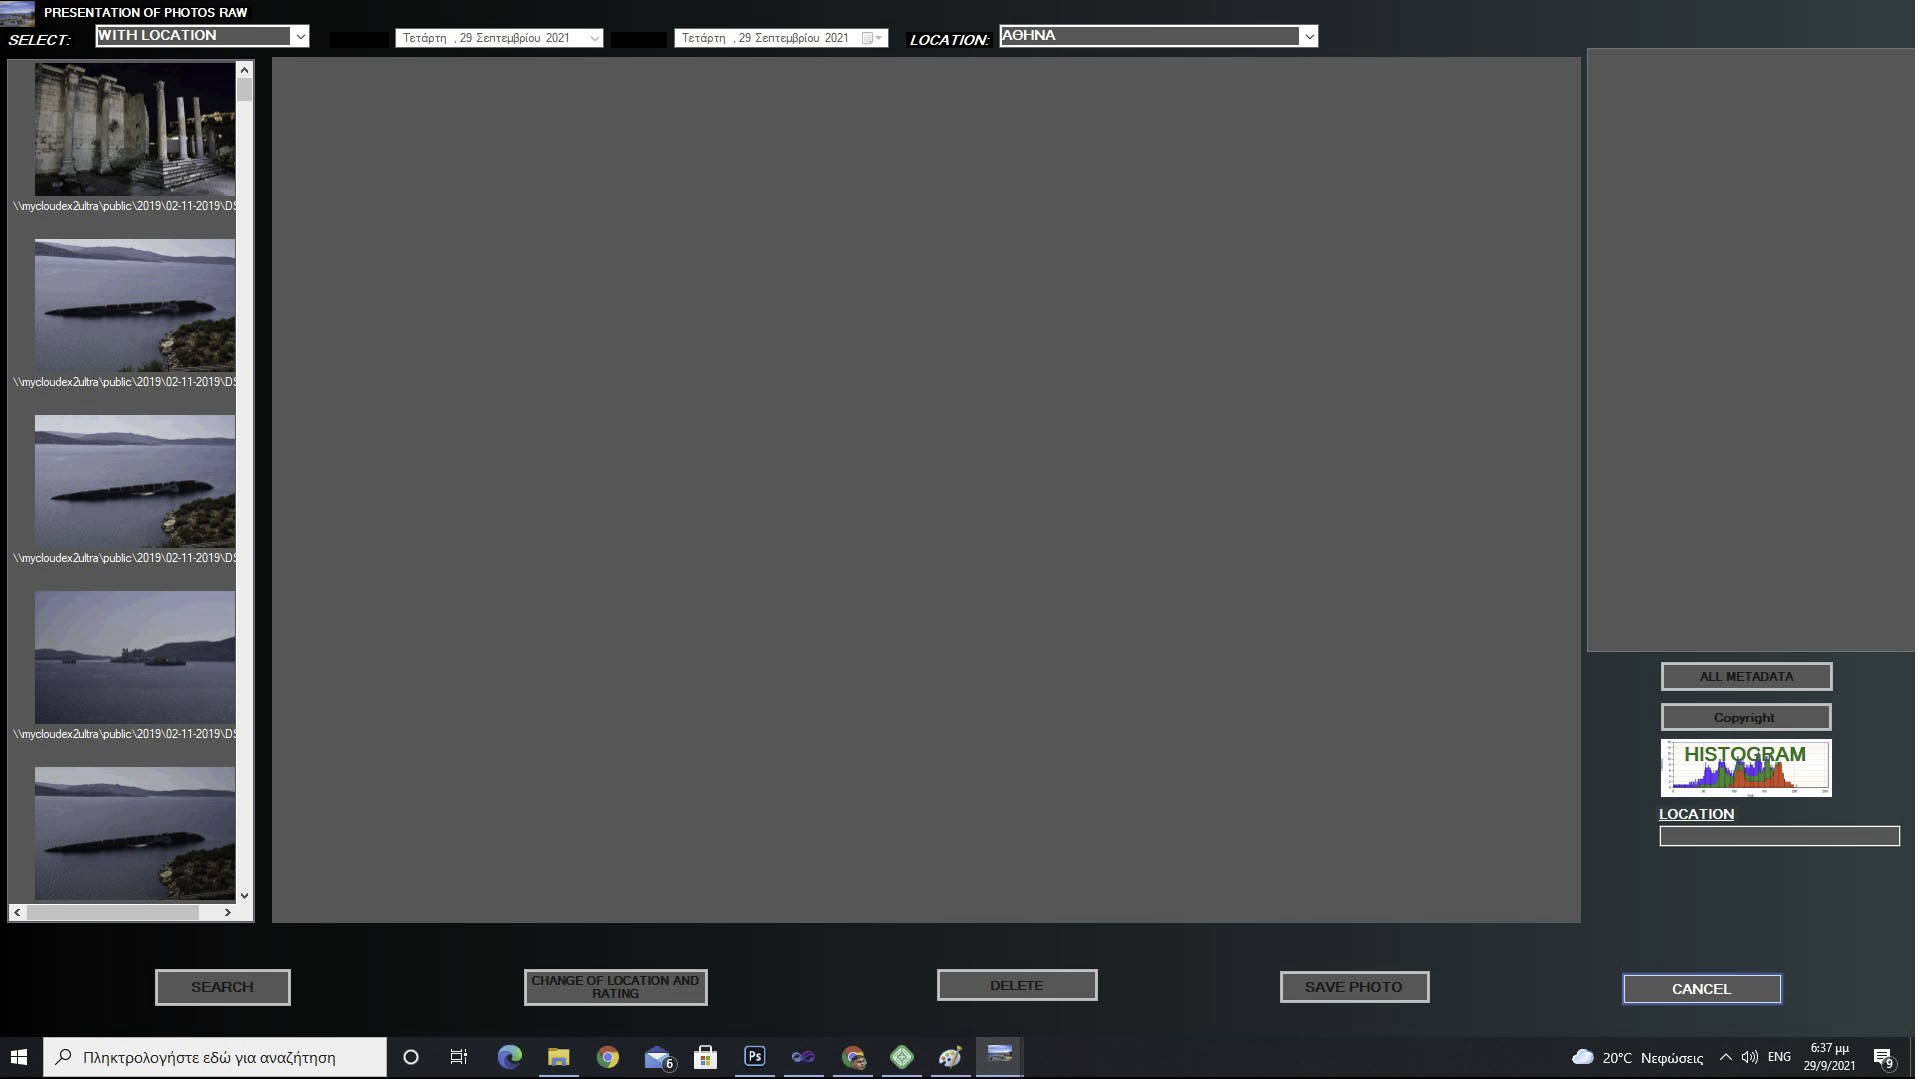
8.PRESENTATION OF PHOTOS RAW
We have three options for searching for registered photos, with dates with location - subject and date and location - subject. Selecting one and selecting the individual selection items, press the SEARGE button and in the left column the thumbnails of the photos that meet the criteria are displayed.
9.PRESENTATION OF PHOTOS RAW
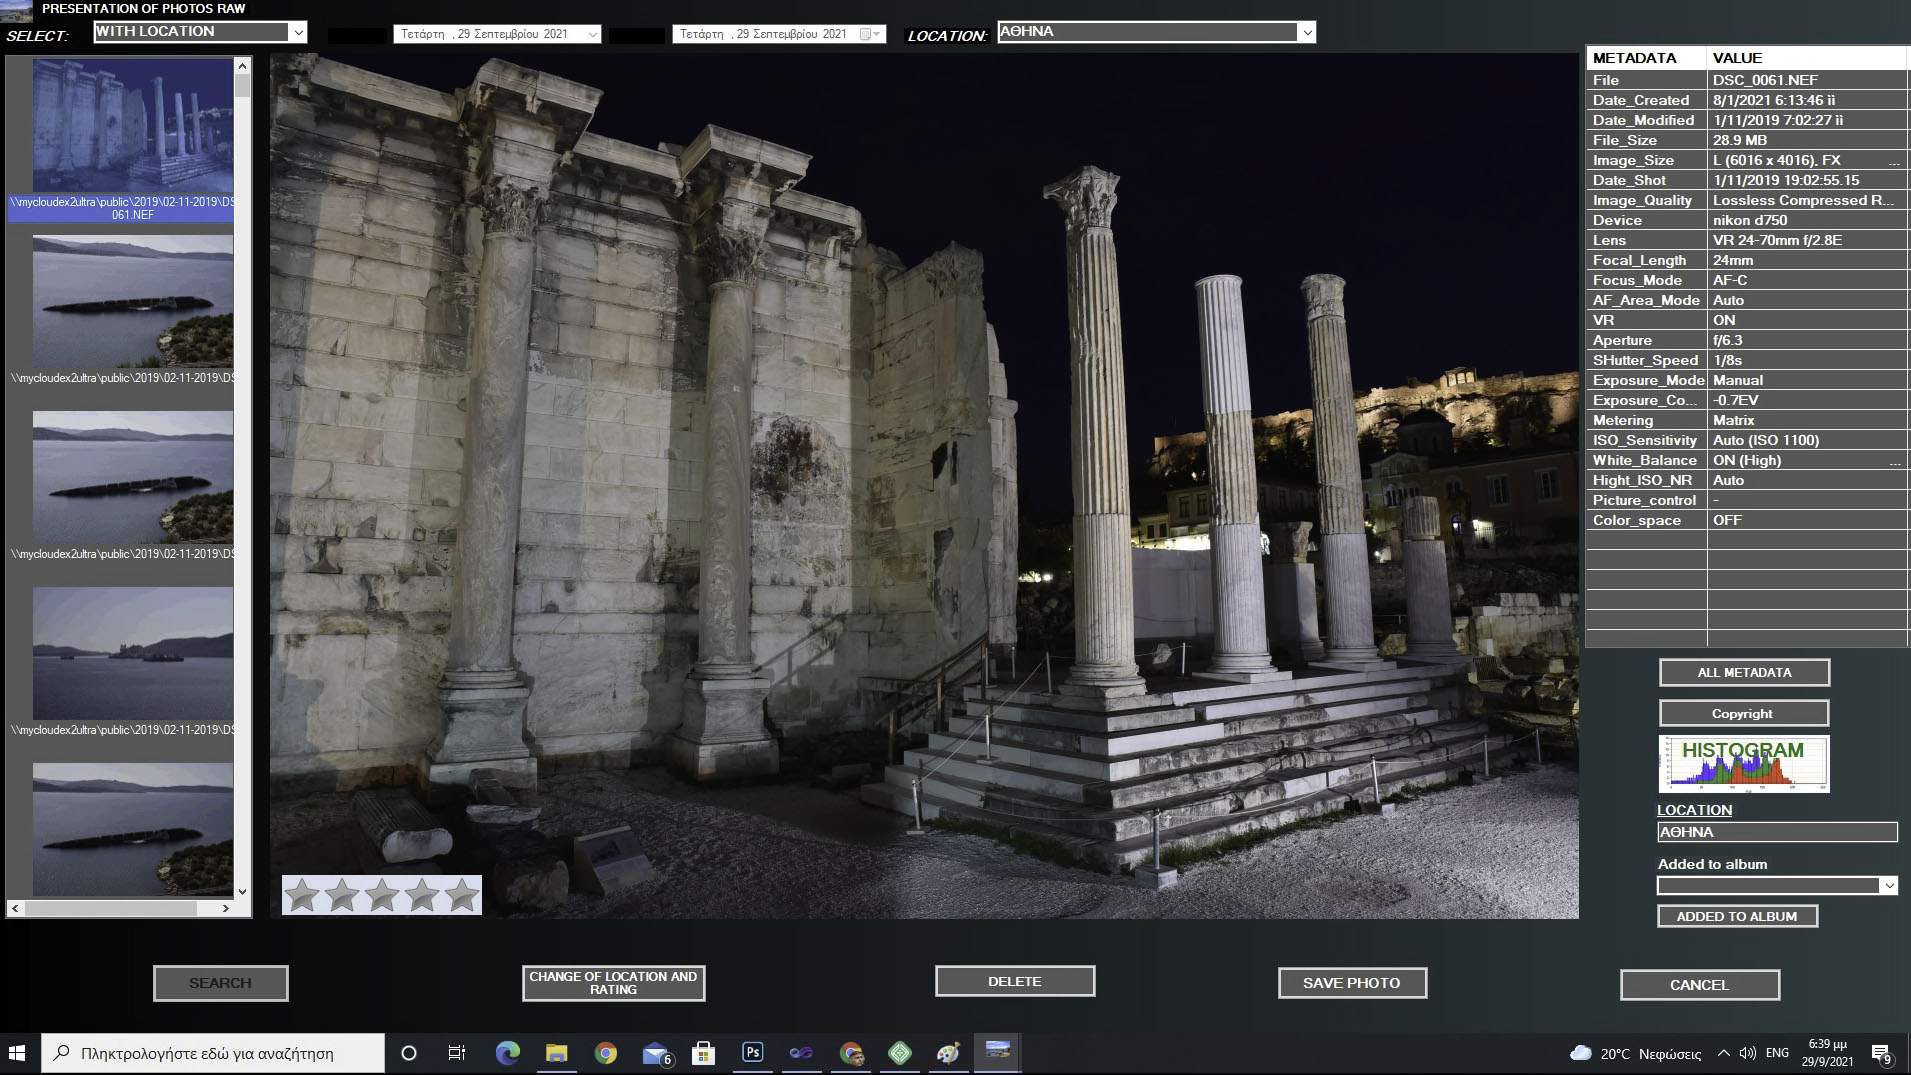
By clicking on a thumbnail, you display the photo in the photo window, as well as in the right column selected metadata of the photo
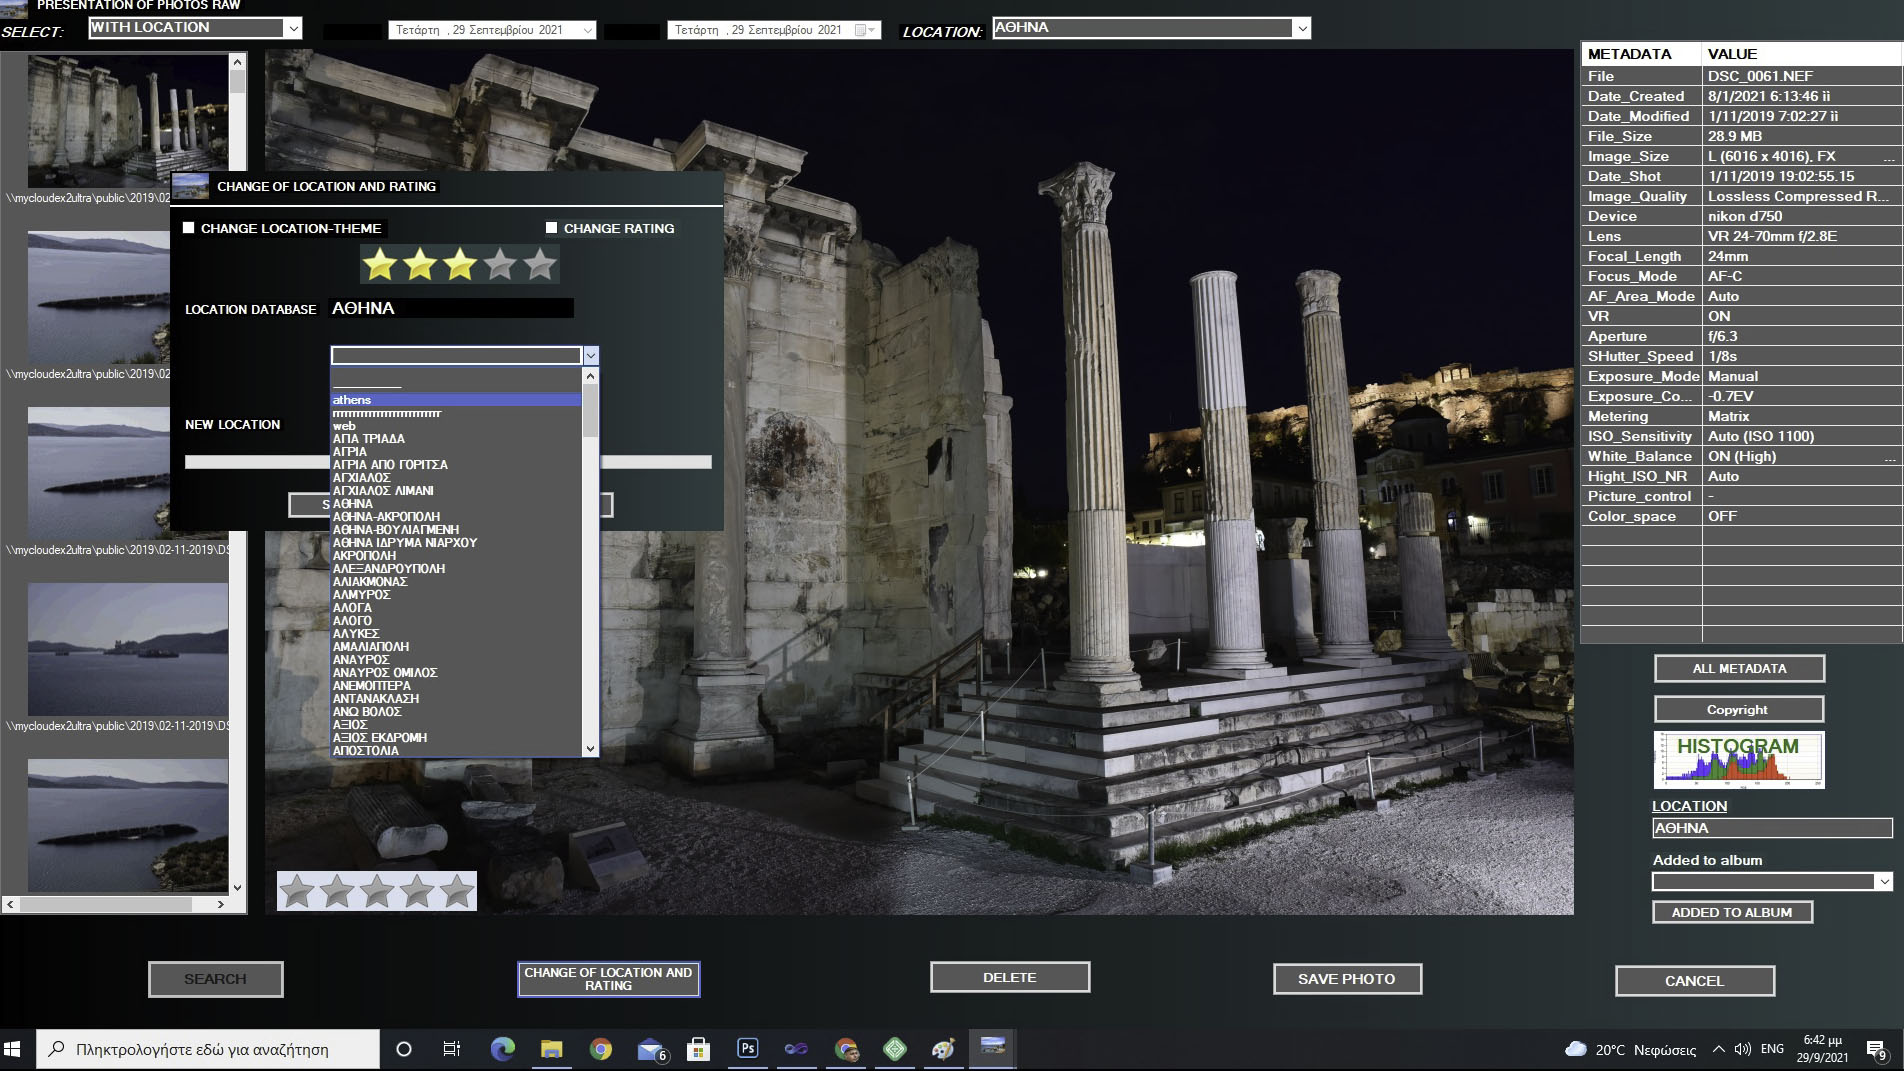
10.PRESENTATION OF PHOTOS RAW
By pressing the CHNGE OF LOCATION AND RATING button in the pop-up window we can change the location - subject of the photo from the drop-down menu as well as its evaluation by holding the cursor on the corresponding star. Selecting SAVE and CLOSE then saves the changes.
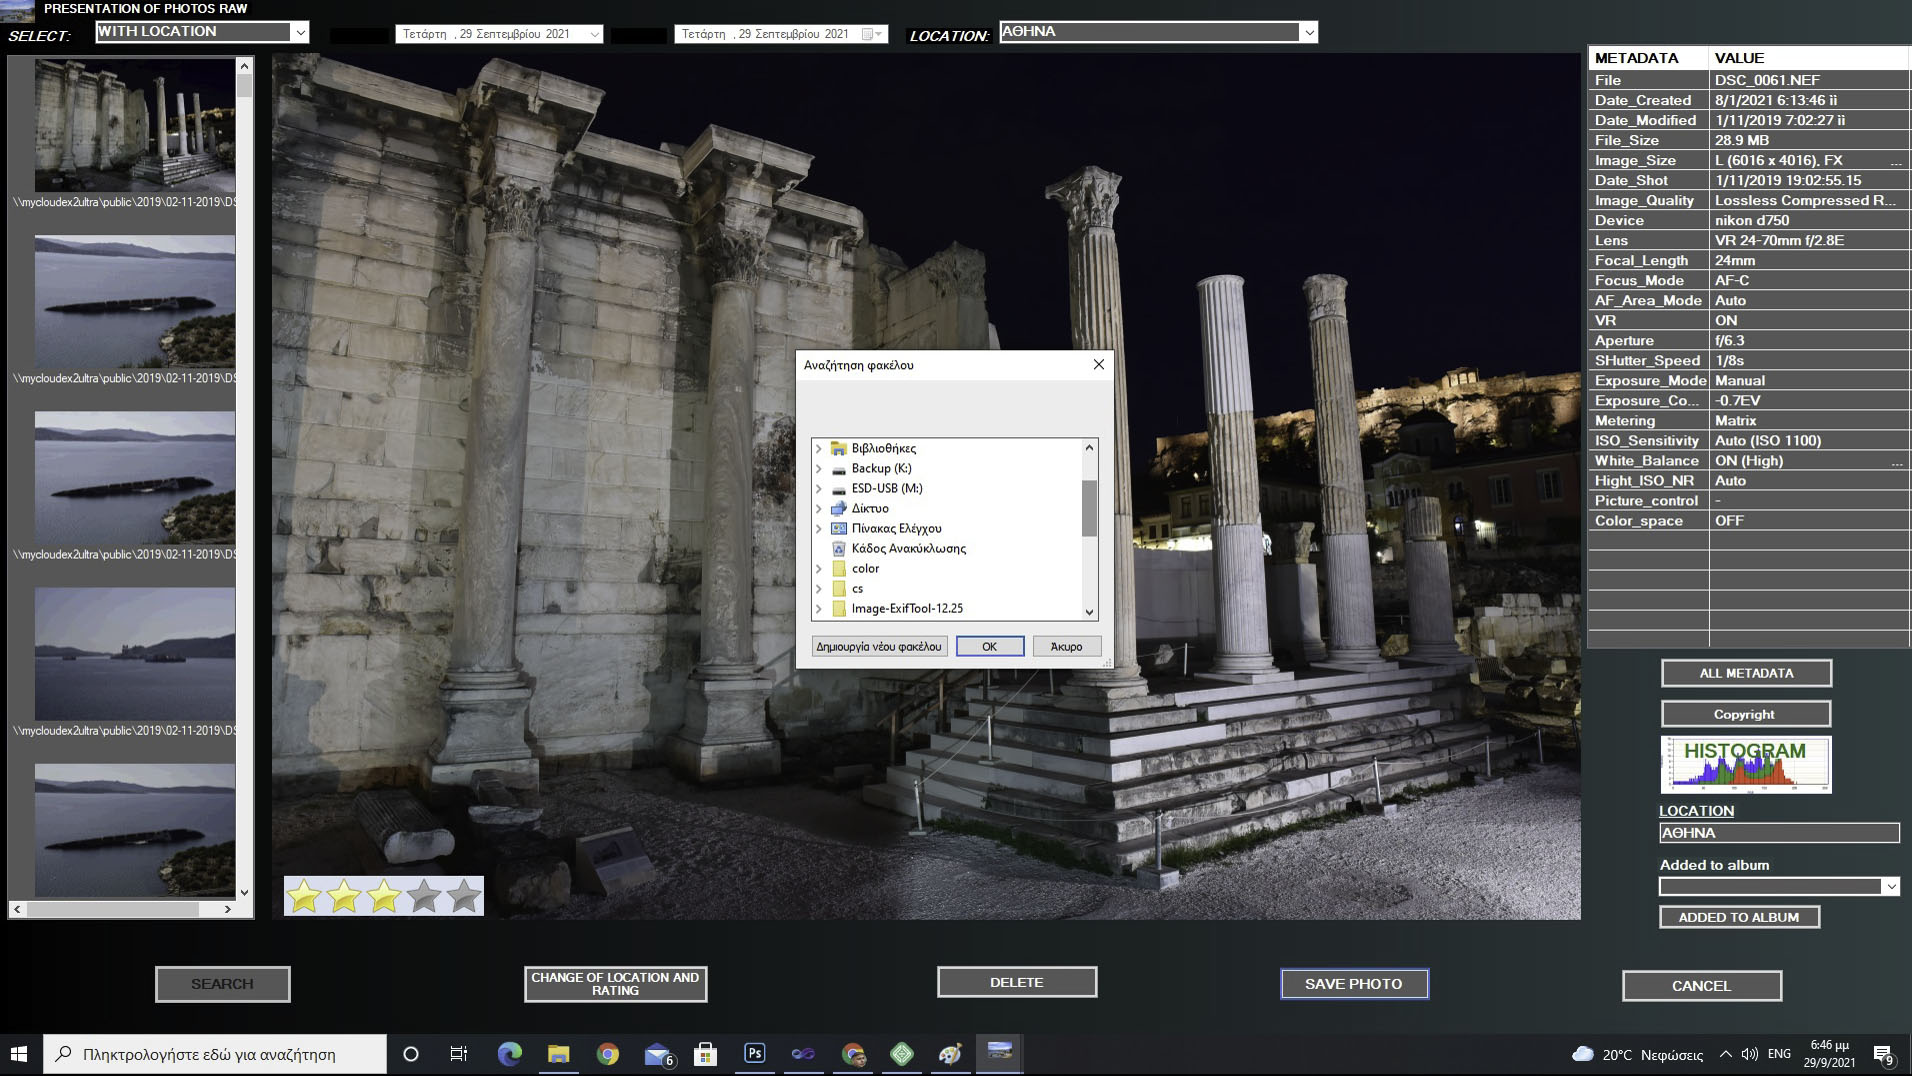
11.PRESENTATION OF PHOTOS RAW
Pressing the SAVE PHOTO button saves the photo to another storage medium by selecting it from the pop-up menu. With the DELETE button you delete the photo from its searches and presentations. Attention, you do not delete from the list we have saved.
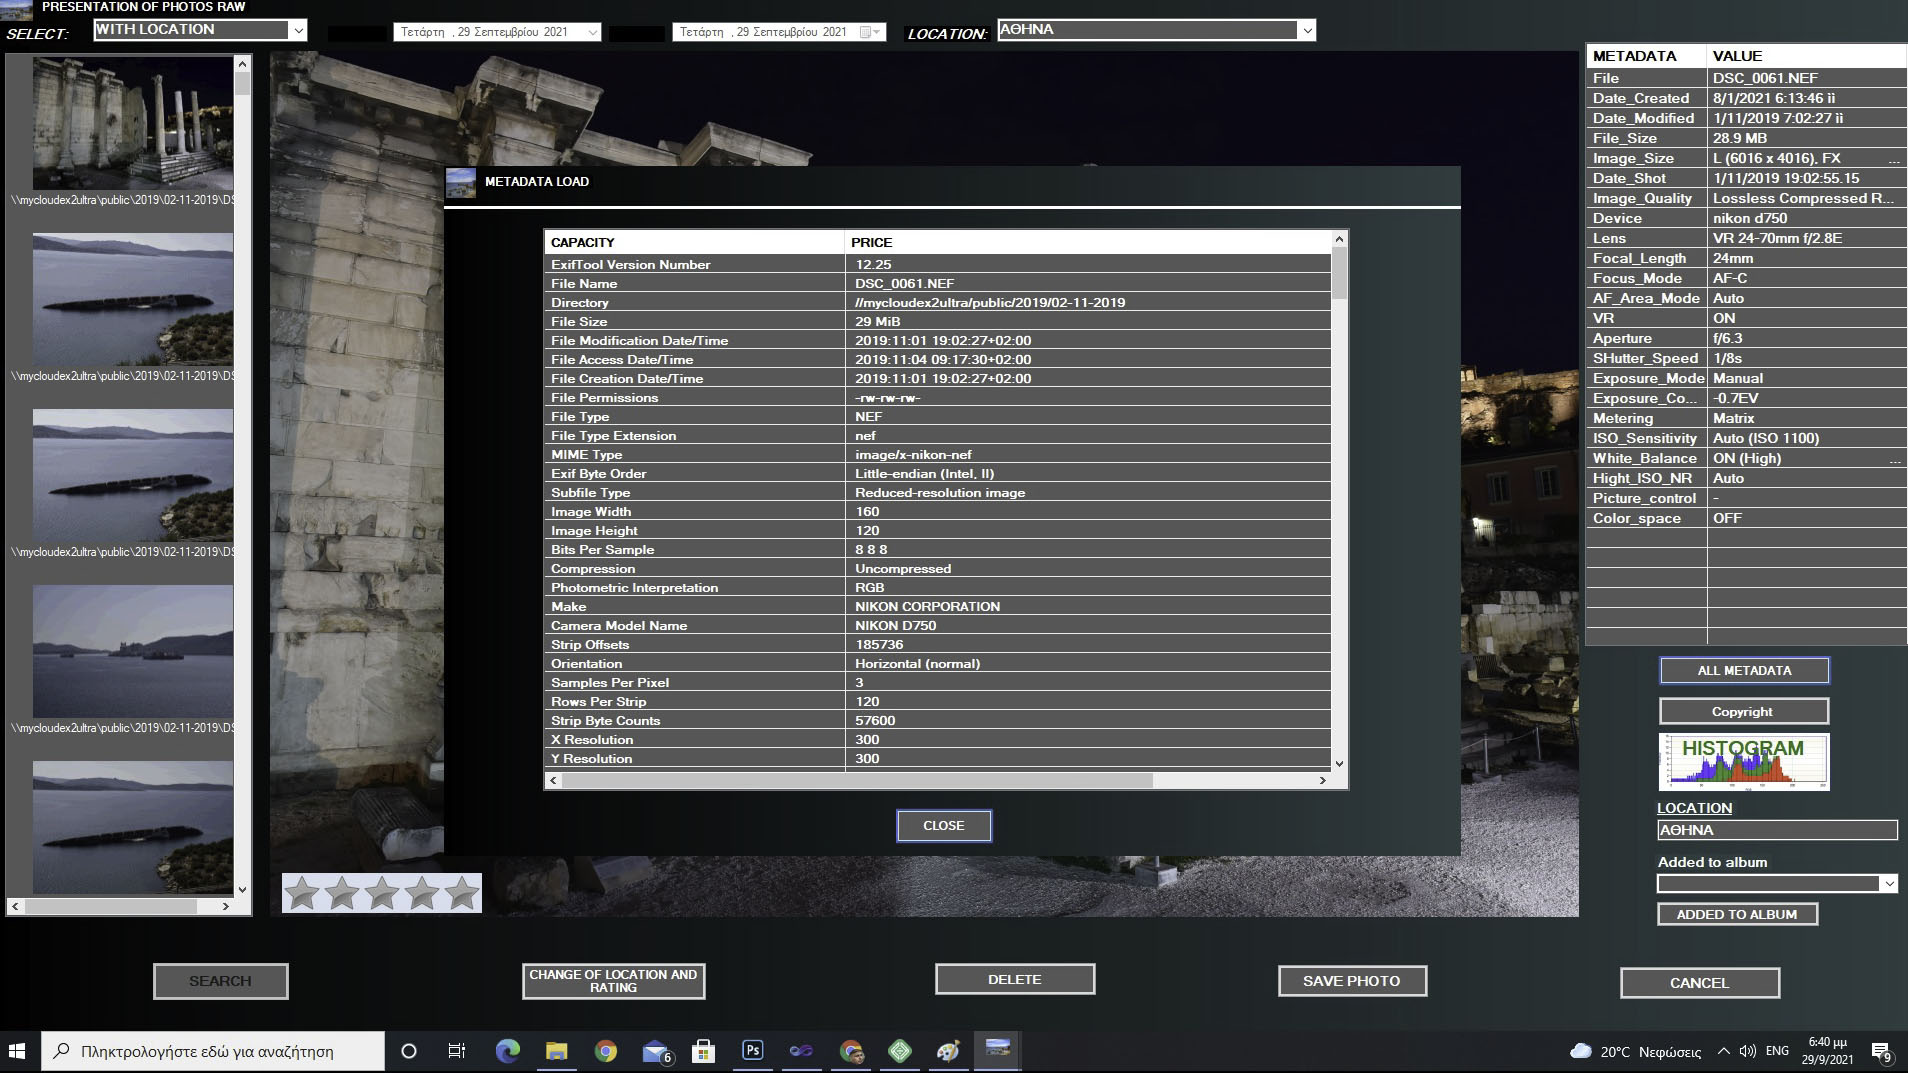
12.PRESENTATION OF PHOTOS RAW
Pressing the ALL METADATA key in a pop-up window displays all the metadata of the photo. By pressing the Copyright button the program automatically writes the name of the creator of the photo in the metadata. Pressing the HISTOGRAM button in a pop-up window displays the RGB histogram of the photo. From the drop-down menu of ADDED TO ALBUM select a placement album or write it if it does not exist and press the ADDED TO ALBUM button
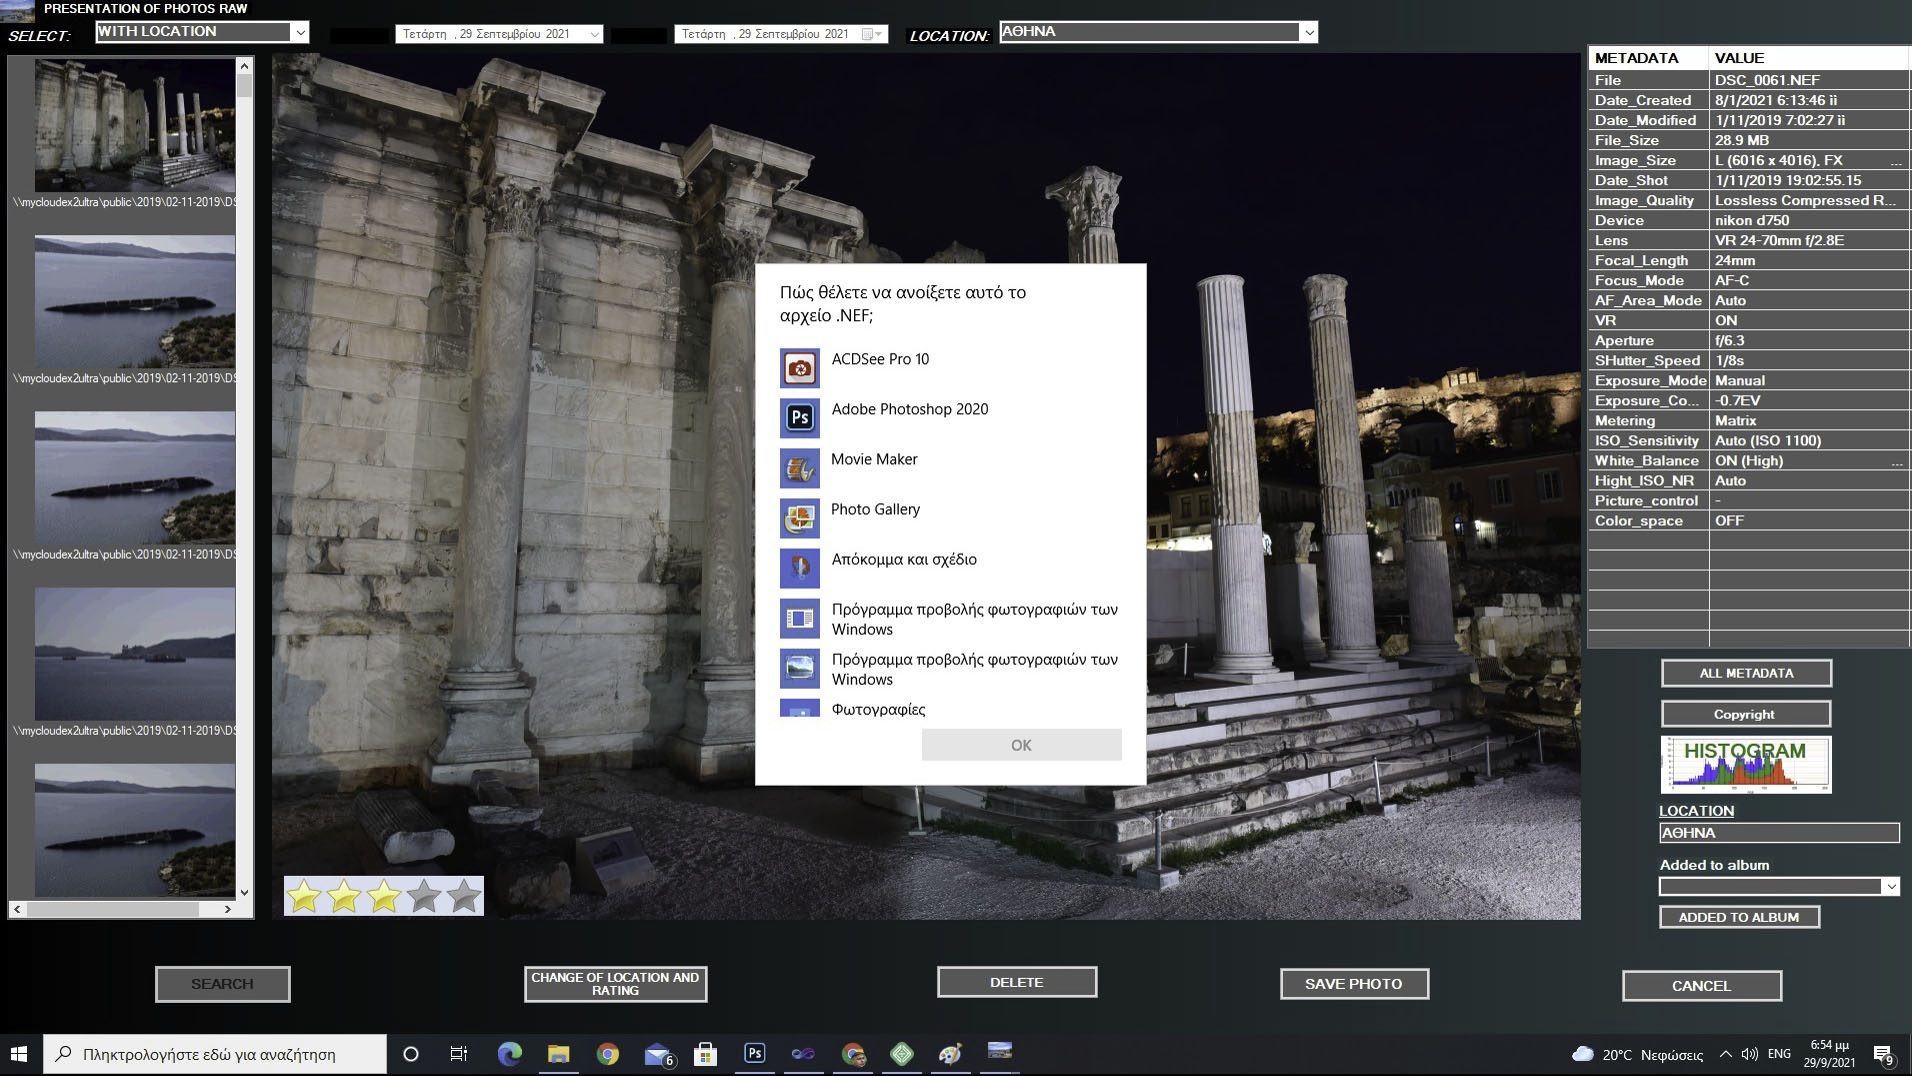
13.PRESENTATION OF PHOTOS RAW
By right-clicking on the photo in the pop-up window we can select the editor that is installed on our computer and the photo is automatically sent to the program.
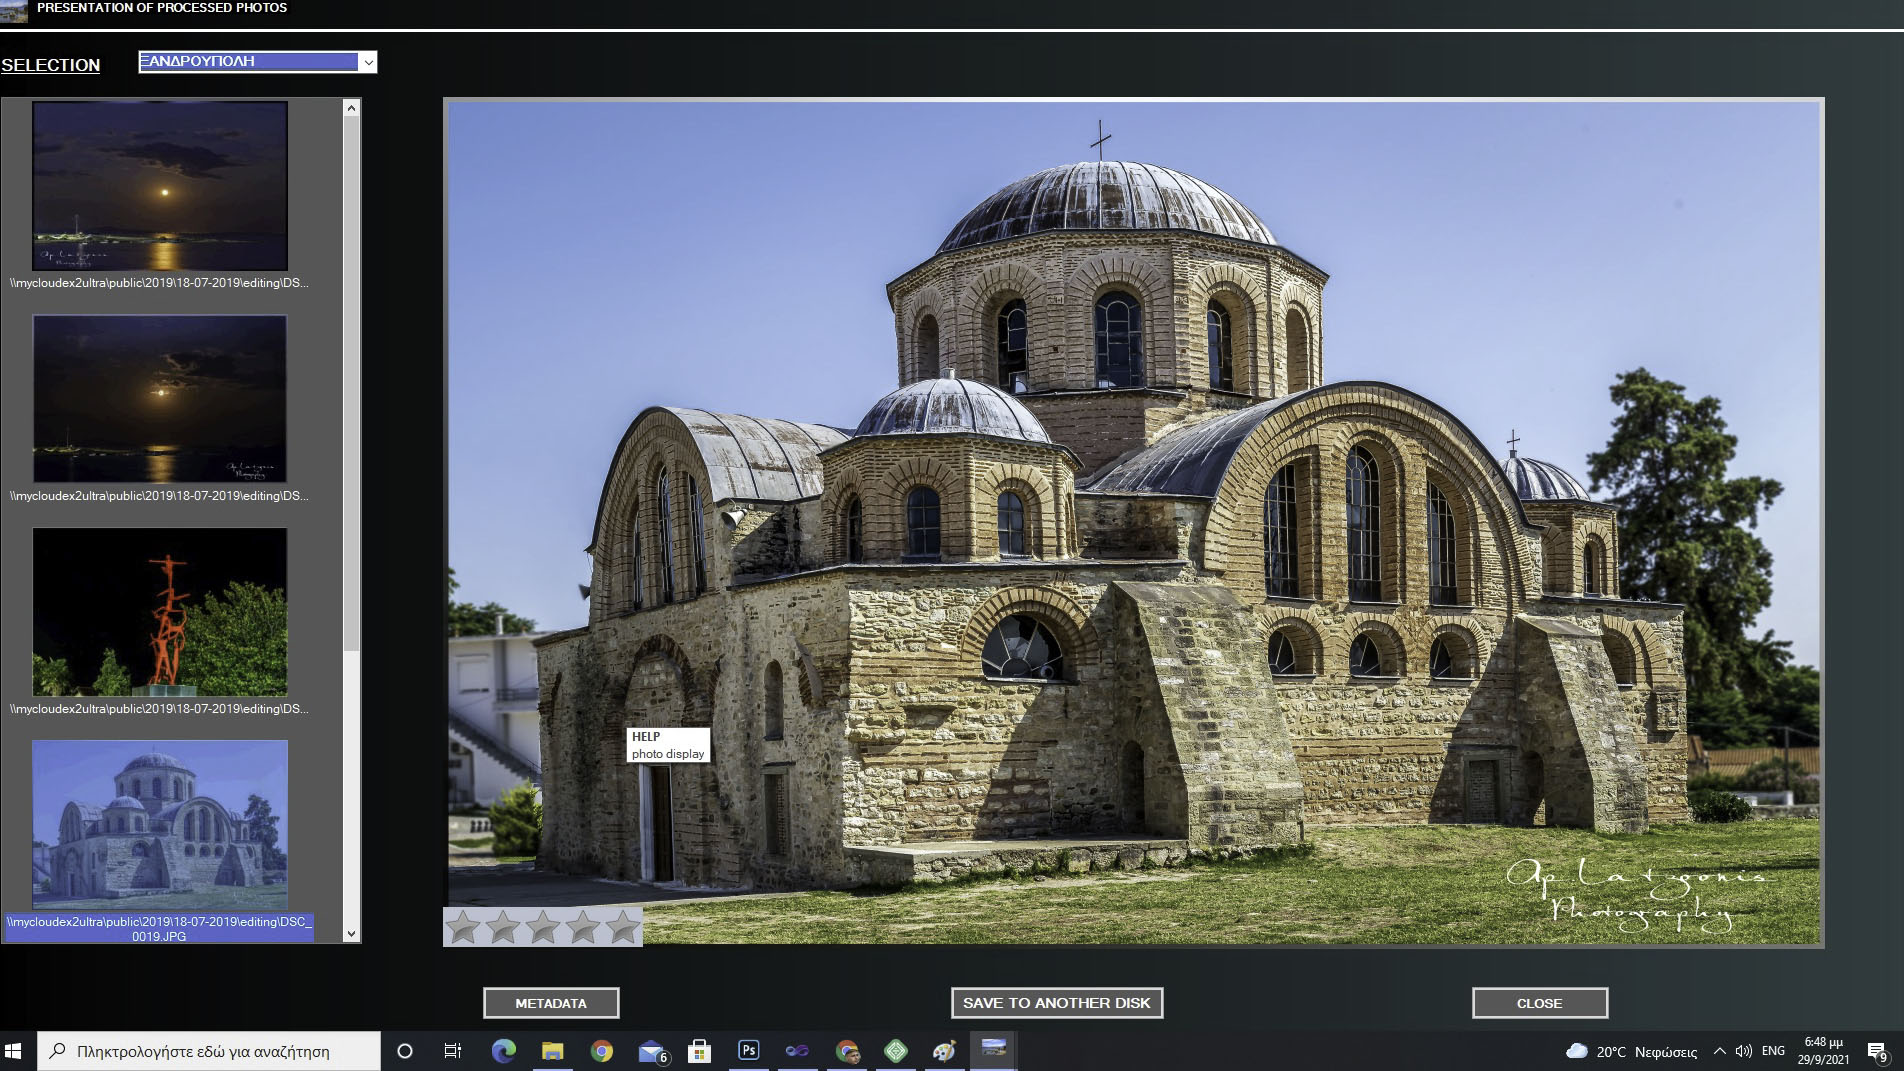
14. PRESENTATION OF PROCESSENT PHOTOS
In the edited photo display screen we select a location - subject and in the left column the thumbnails of the photos that meet the criteria are presented. By clicking on one you display the photo in the presentation window.

15. PRESENTATION OF PROCESSENT PHOTOS
Pressing the METADATA key in a pop-up window displays all the metadata of the photo
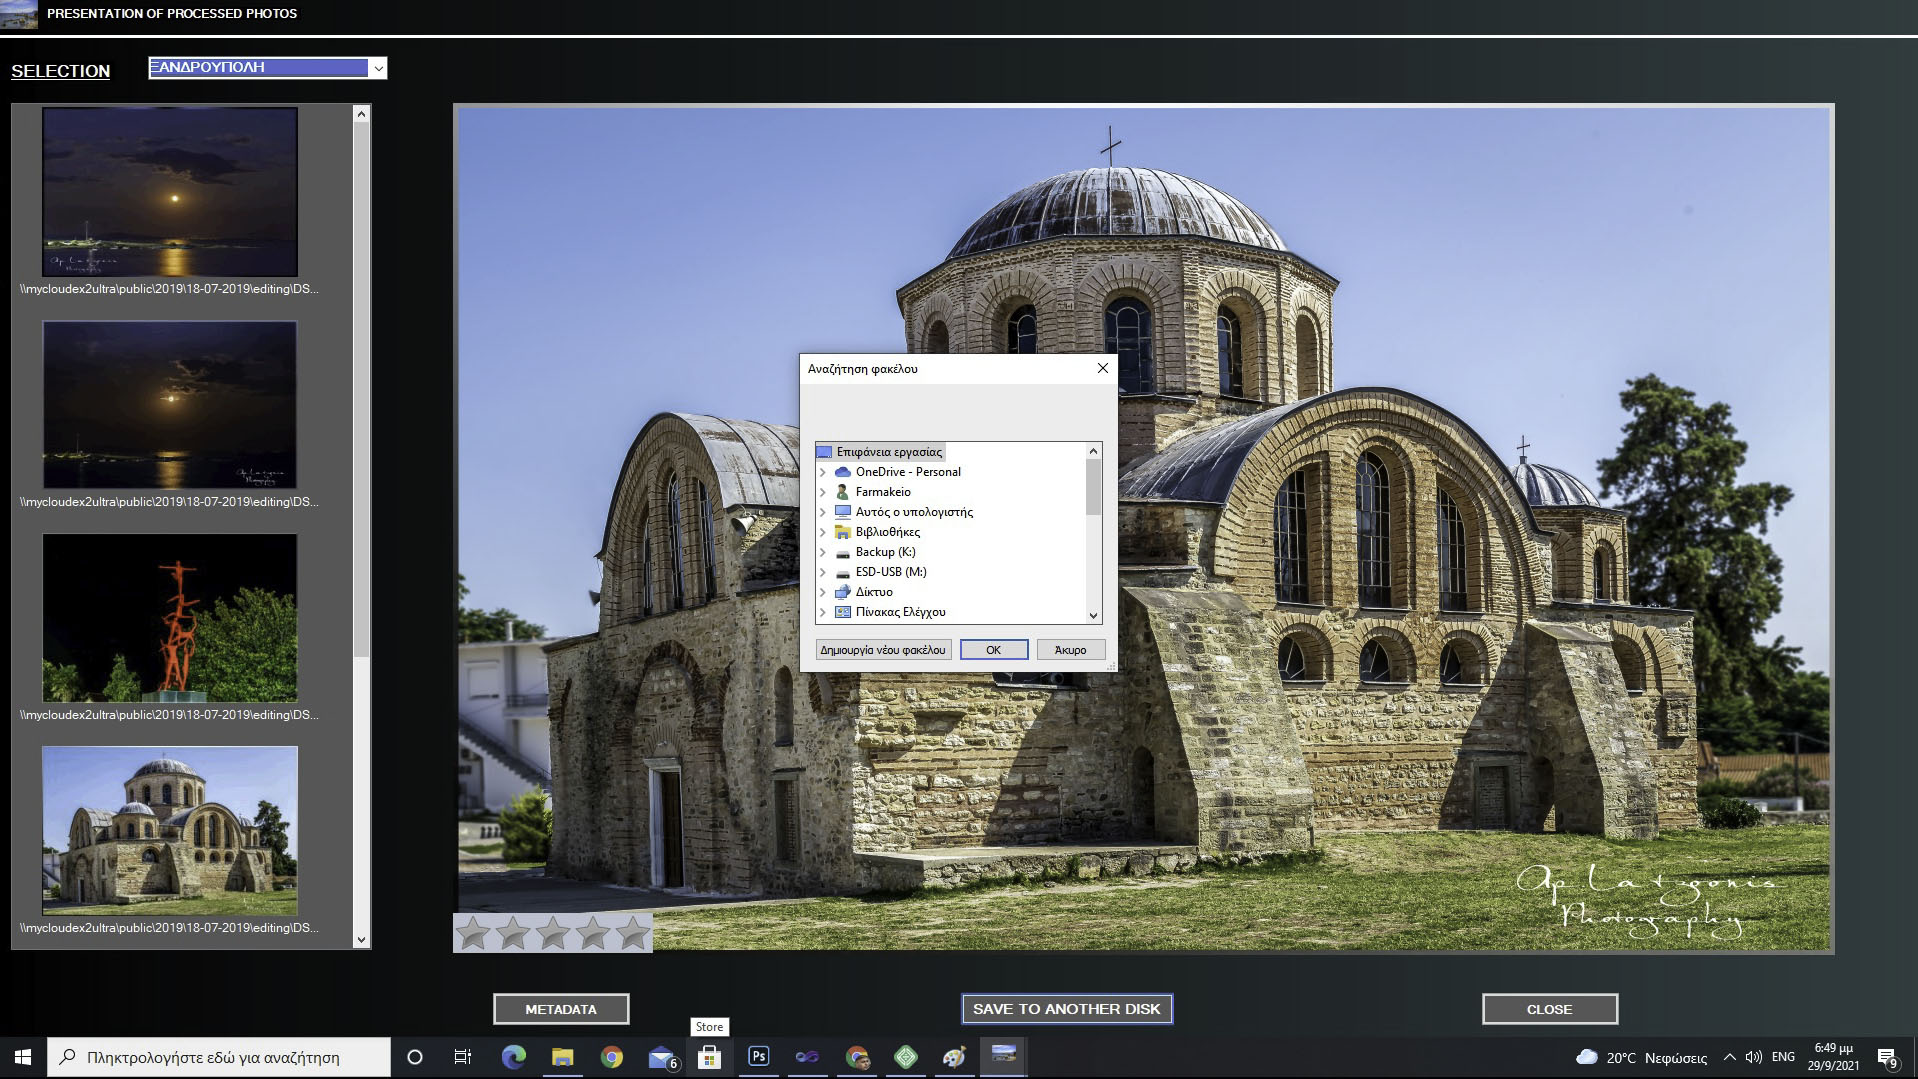
16. PRESENTATION OF PROCESSENT PHOTOS
Pressing the SAVE TO ANOTHER DISK key from the pop-up window selects the disk or the folder to save the photo
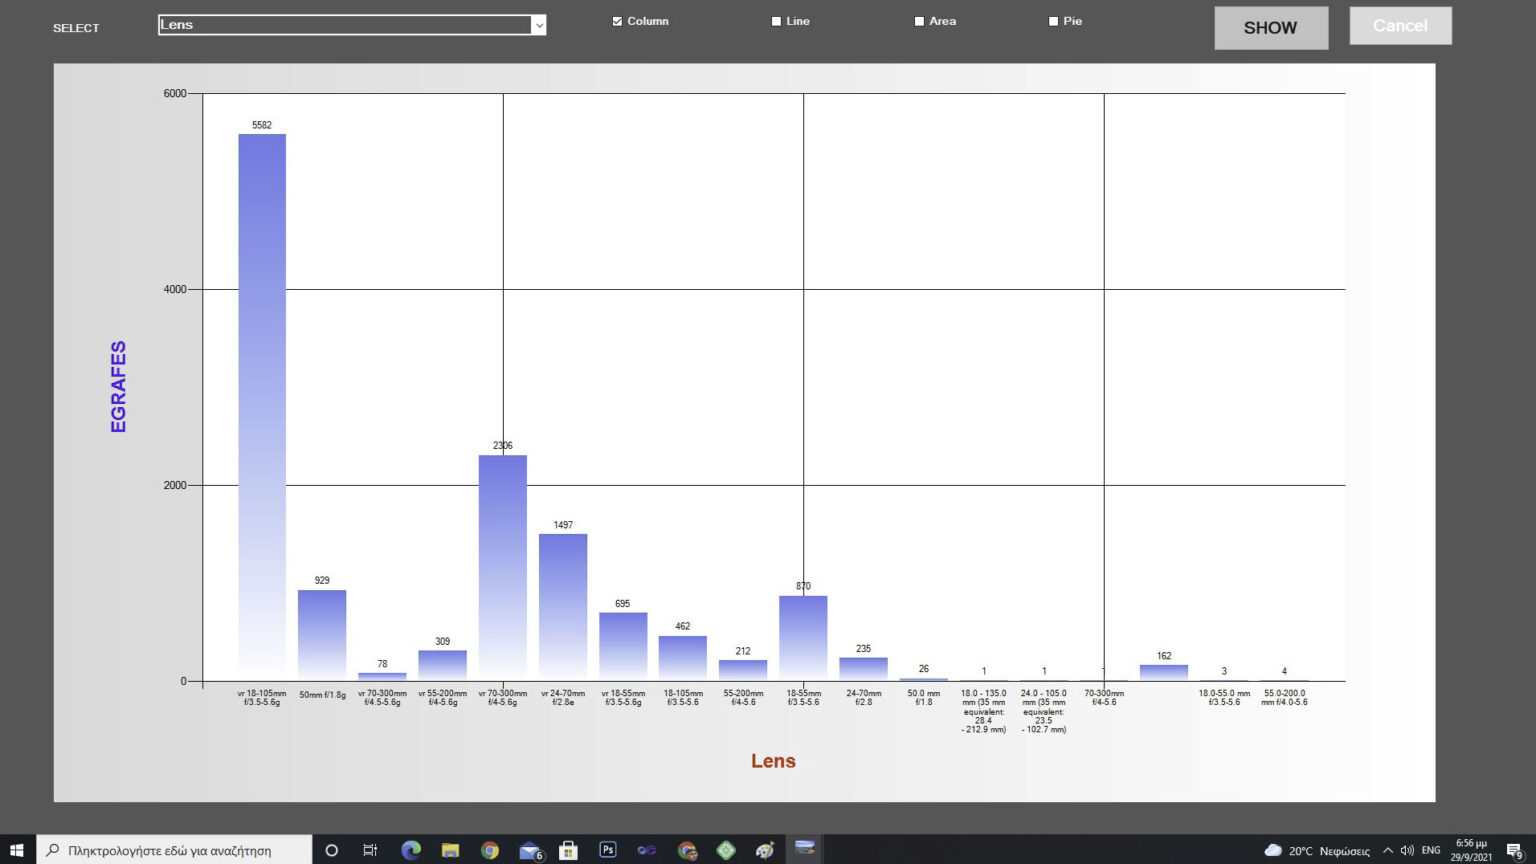
17.RECEPTION STATISTICS
On the screen we see the statistics of the photos registered in the database. Select from SELECT and check the presentation option and press SHOW.
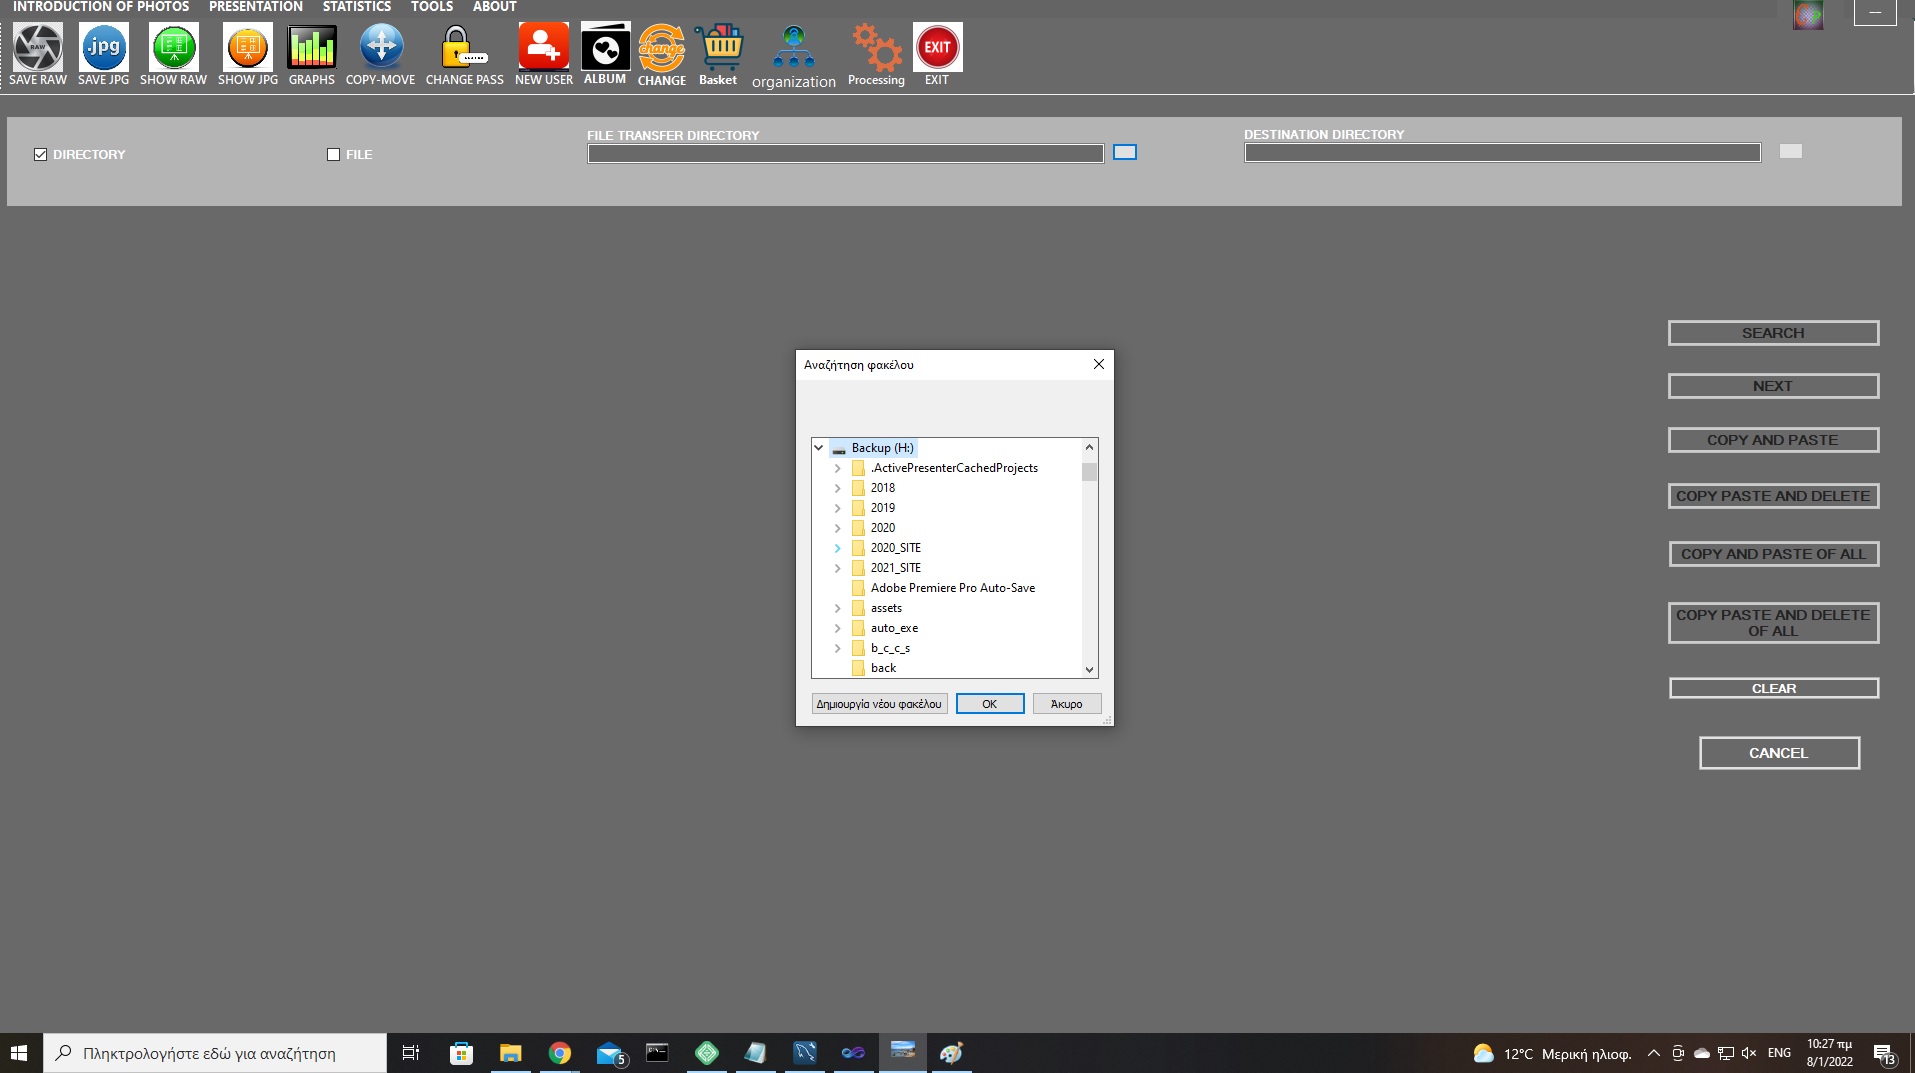
18. TRANSFER FILES
Here you can transfer registered photos or in a different folder or storage medium. It must be used to transfer registered photos otherwise the program will not be able to find and present them. By pressing the button next to the box FILE TRANSFER select DIRECT file, depending on what we have checked DIRECTORY or FILE from the pop-up window.
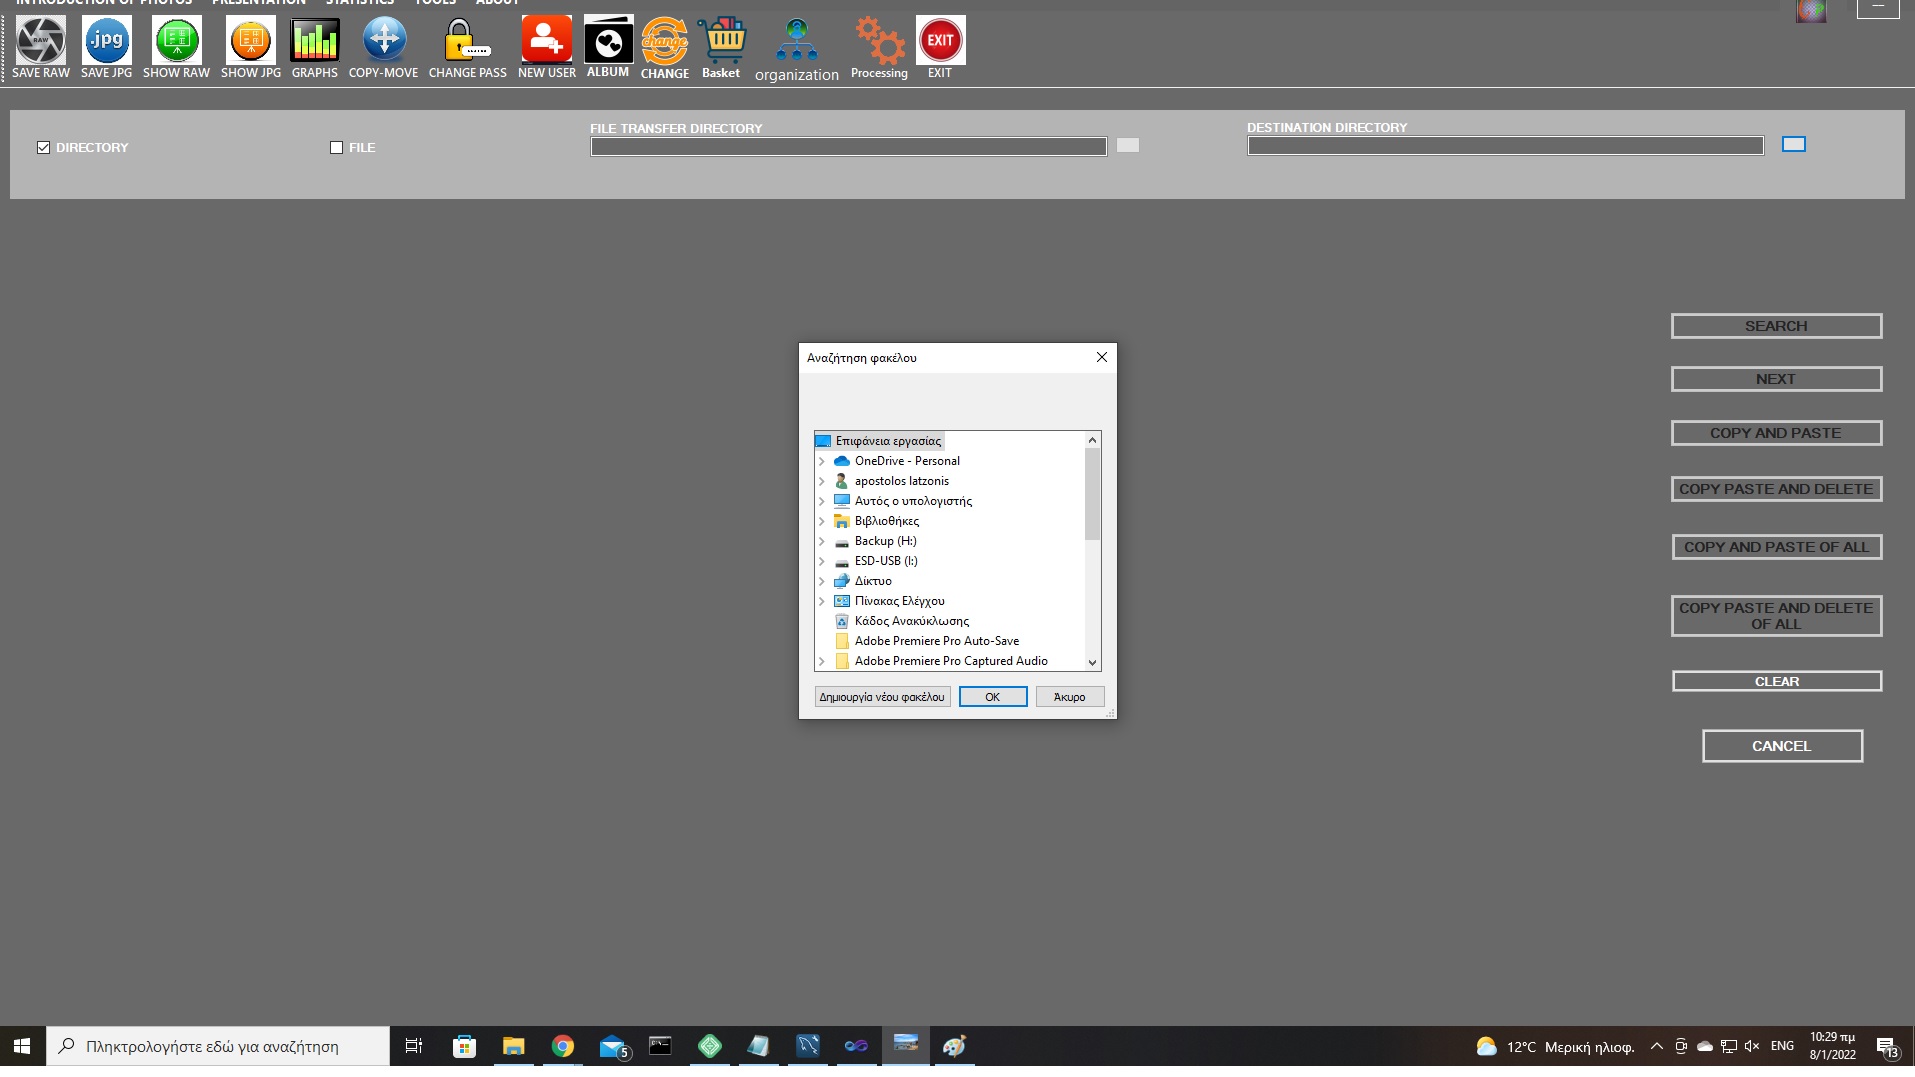
19. TRANSFER FILES
by pressing the button next to the DESTINATION DIRECTORY box, select the destination directory and press the SEARCH key

20. TRANSFER FILES
The selected files appear in the left column and the first photo in the preview window. The options are save to the new directory and Keep the photo to the original directory, save to the new directory and delete from the original, save the entire directory or keep it in its original position either by deleting the .The program checks for duplicates or own names suggesting the necessary changes
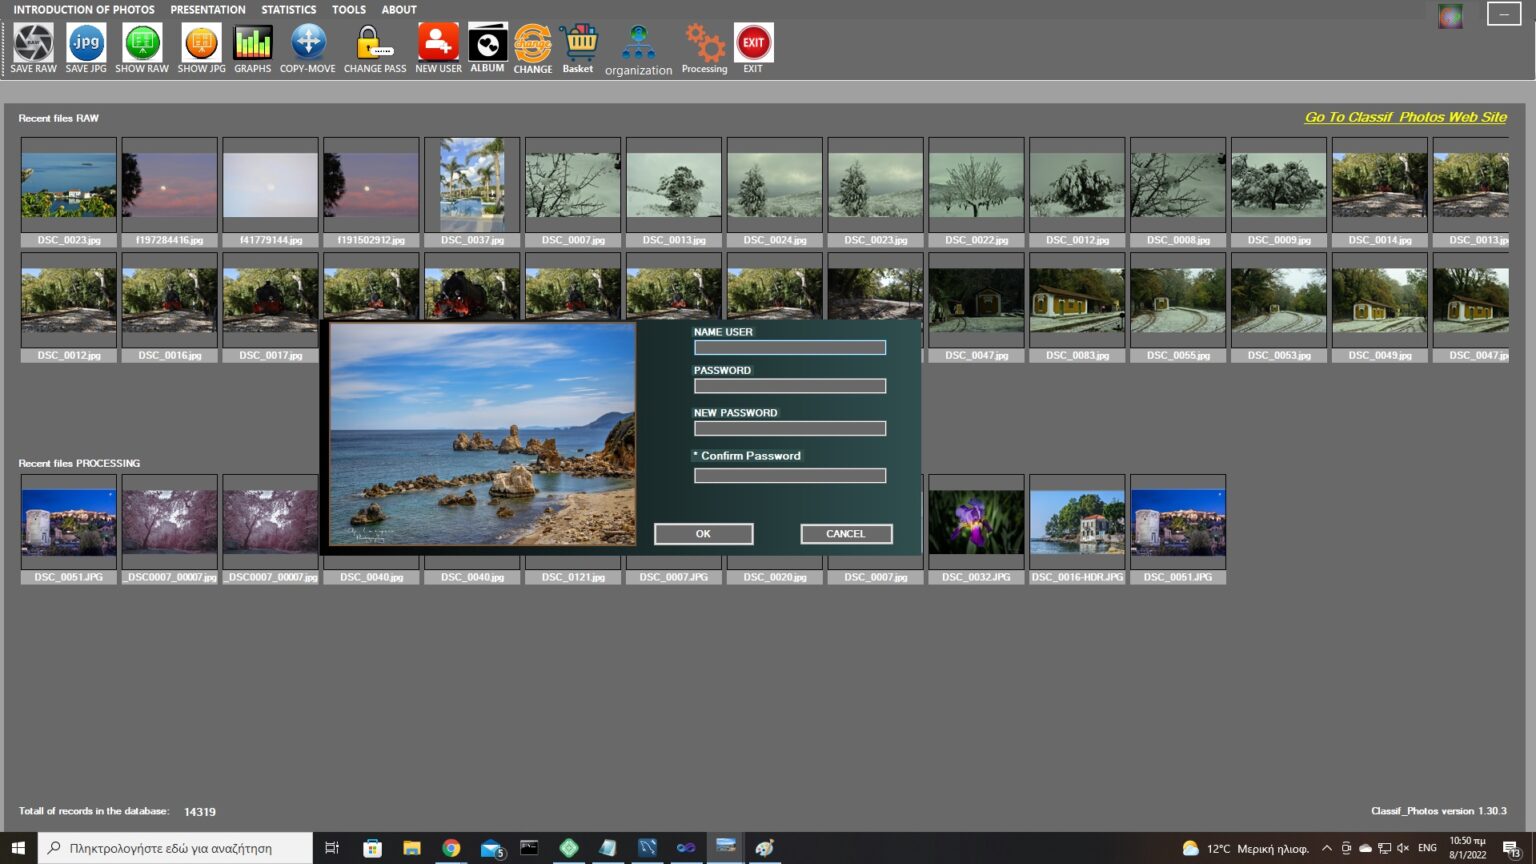
21. CHANGE PASSWORD
This option is used in case we want to change the password in the program. Setting the existing login details and entering confirming the new password press OK.

22. Create a new user in the program
the program allows many users to each manage ONLY their own photos. Enter the details of the new user and pressing the SING UP key enters the database
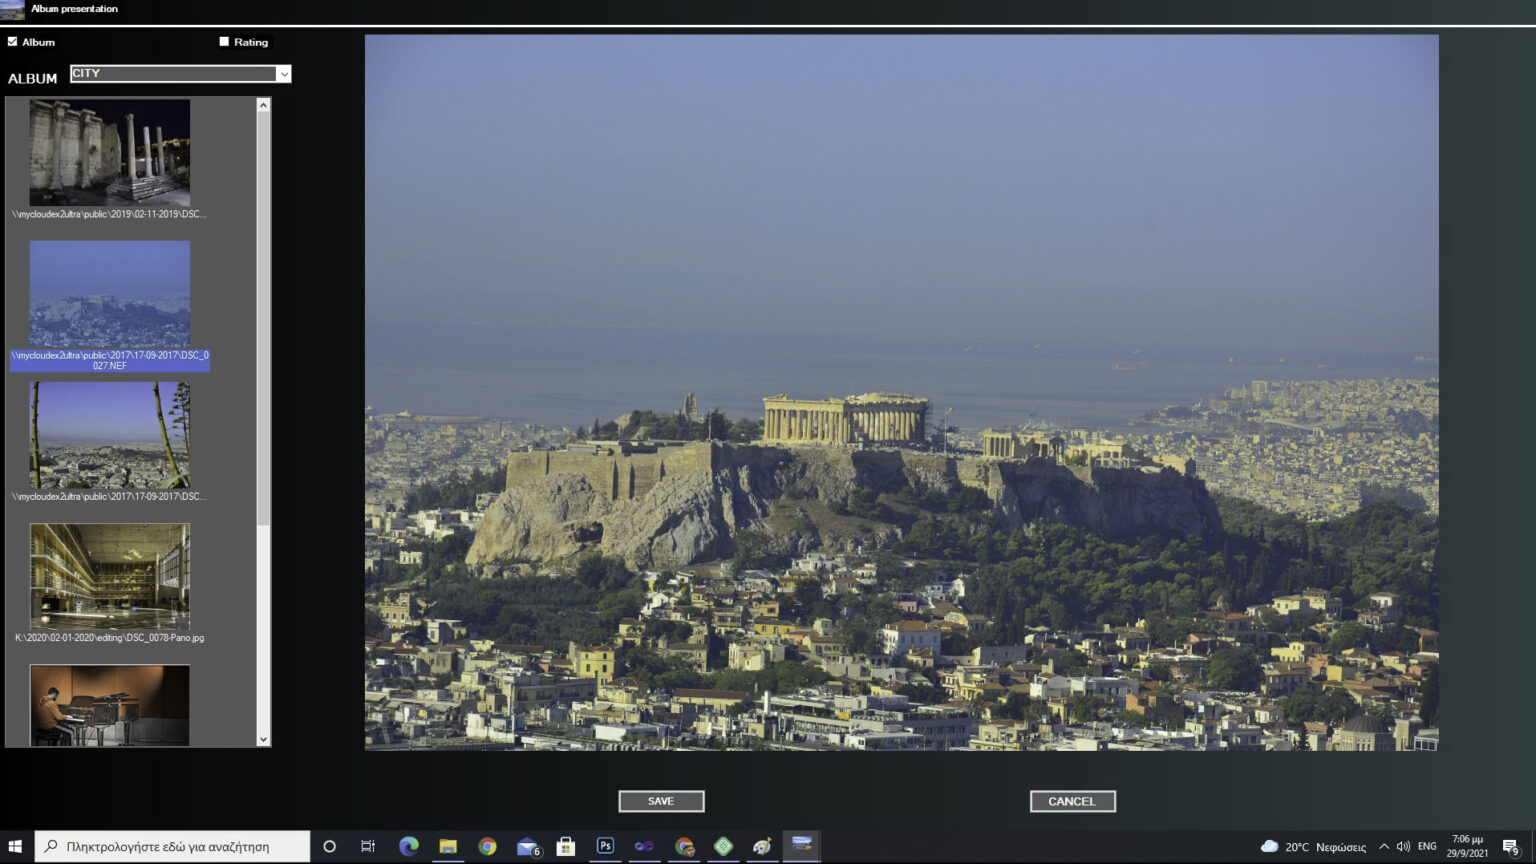
23. Album and Rating presentation
this option displays the photos from the selected album or the photos based on the rating. The SAVE key is used to save a photo to another storage medium if needed.
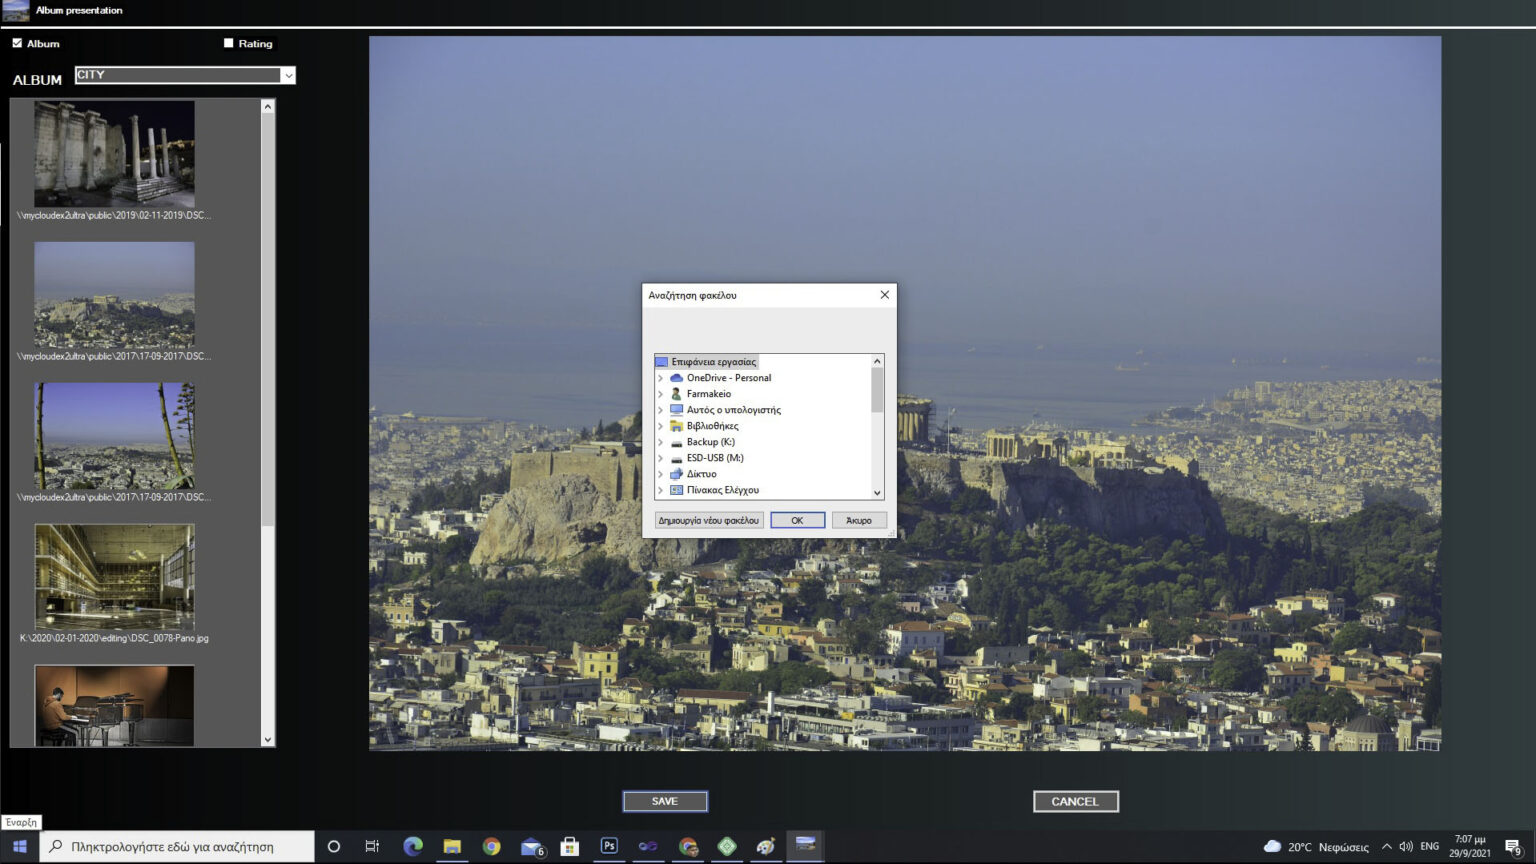
24. Album and Rating presentation
in the pop-up window select the media in which we want to save the specific photo.
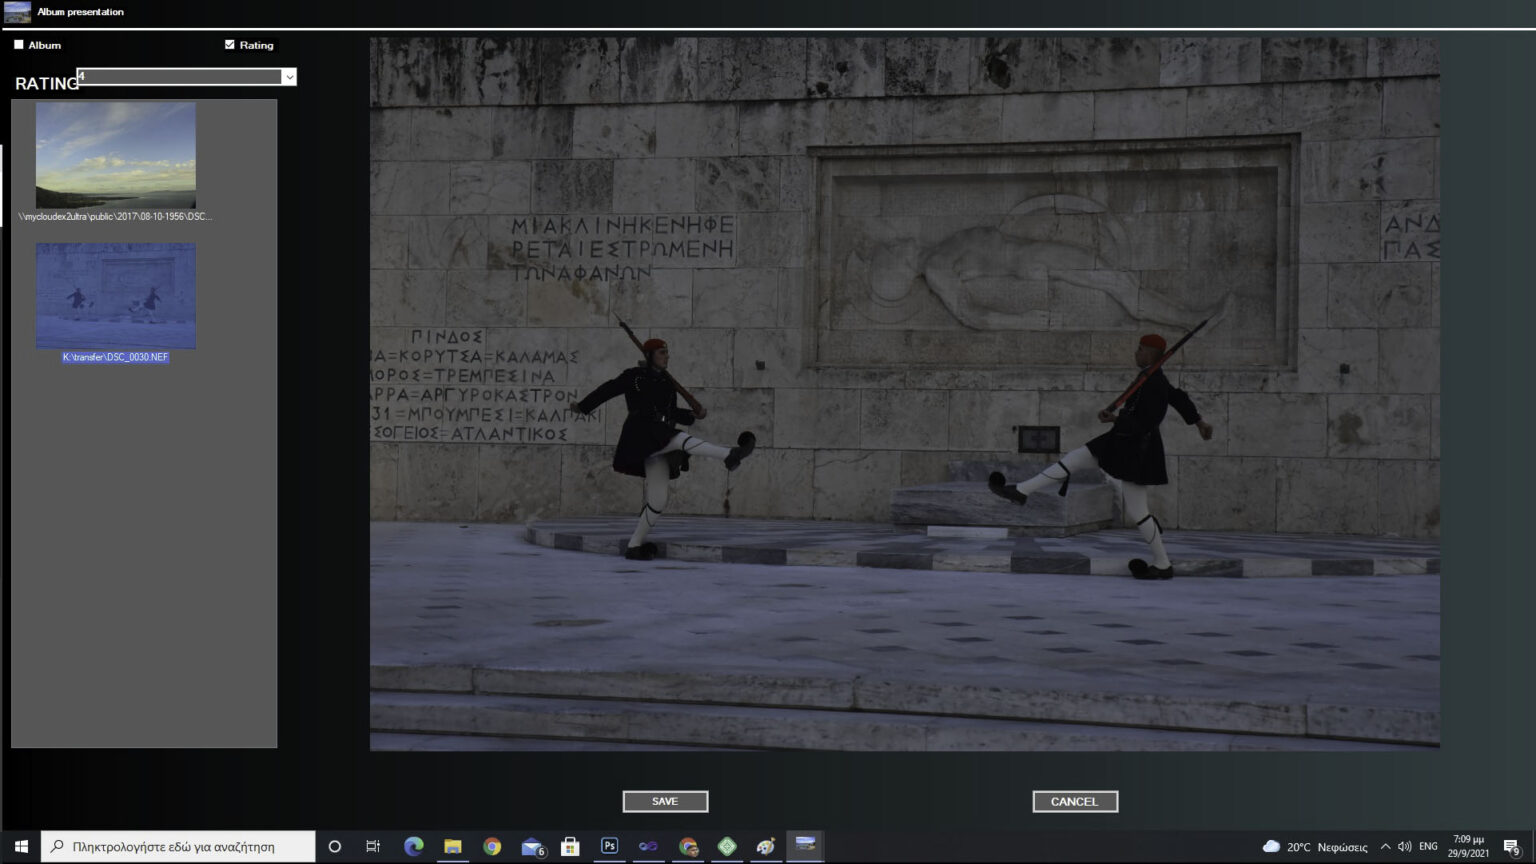
25. Album and Rating presentation
Clicking on a photo thumbnail displays you in the preview window.
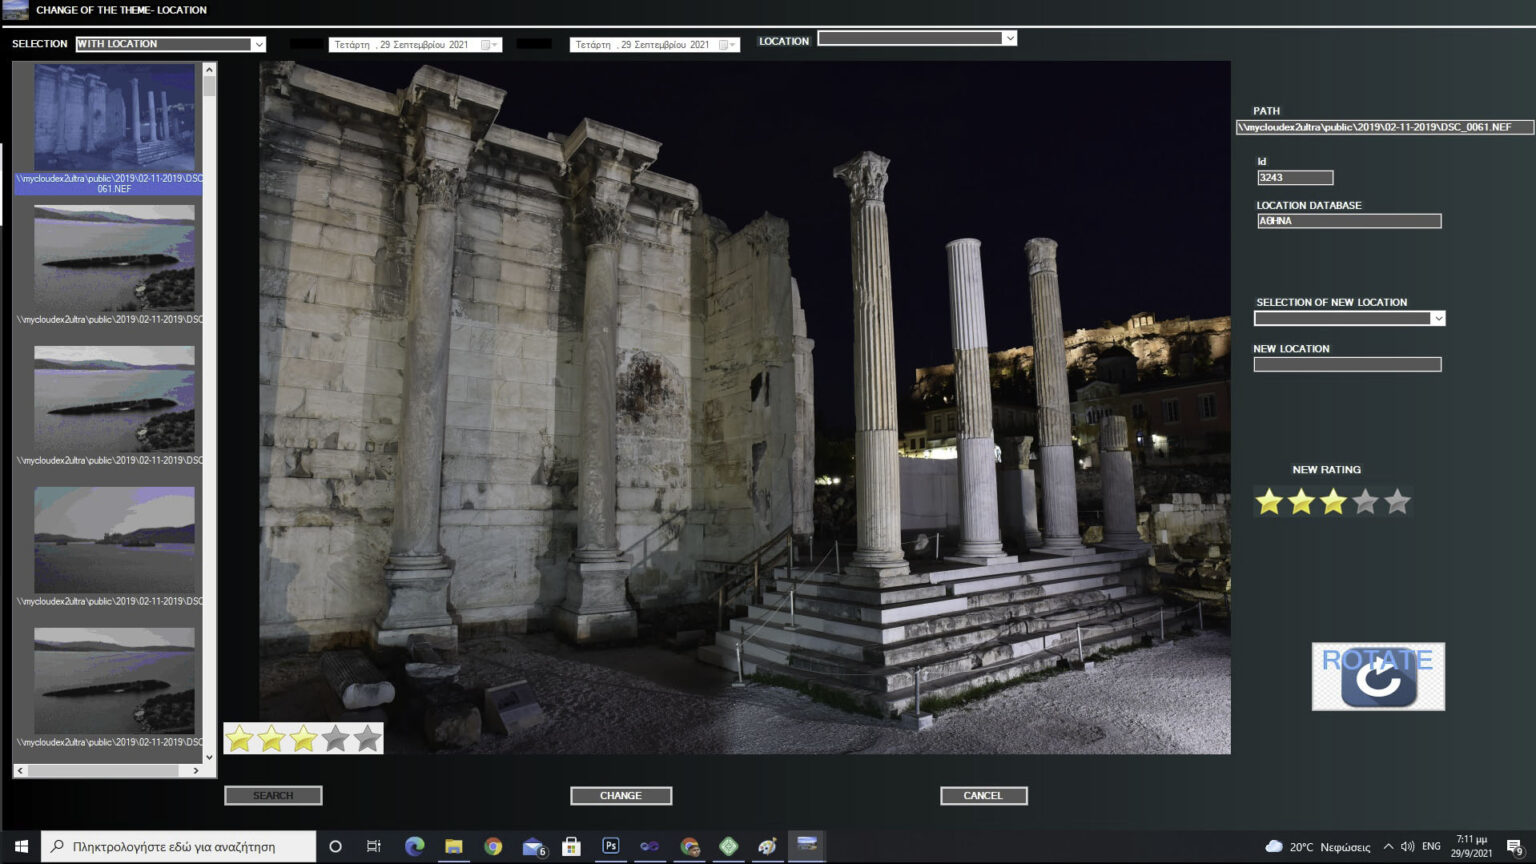
26. CHANGE OF THE ΤΗΕΜΕ- LOCATION AND RATING
Select the selection criterion from the drop-down menu, either subject-location, or date, or date-subject-location and press SEARCH and click on a thumbnail of the left column and display the photo in the presentation window and its entered data on the right side, section - location and evaluation
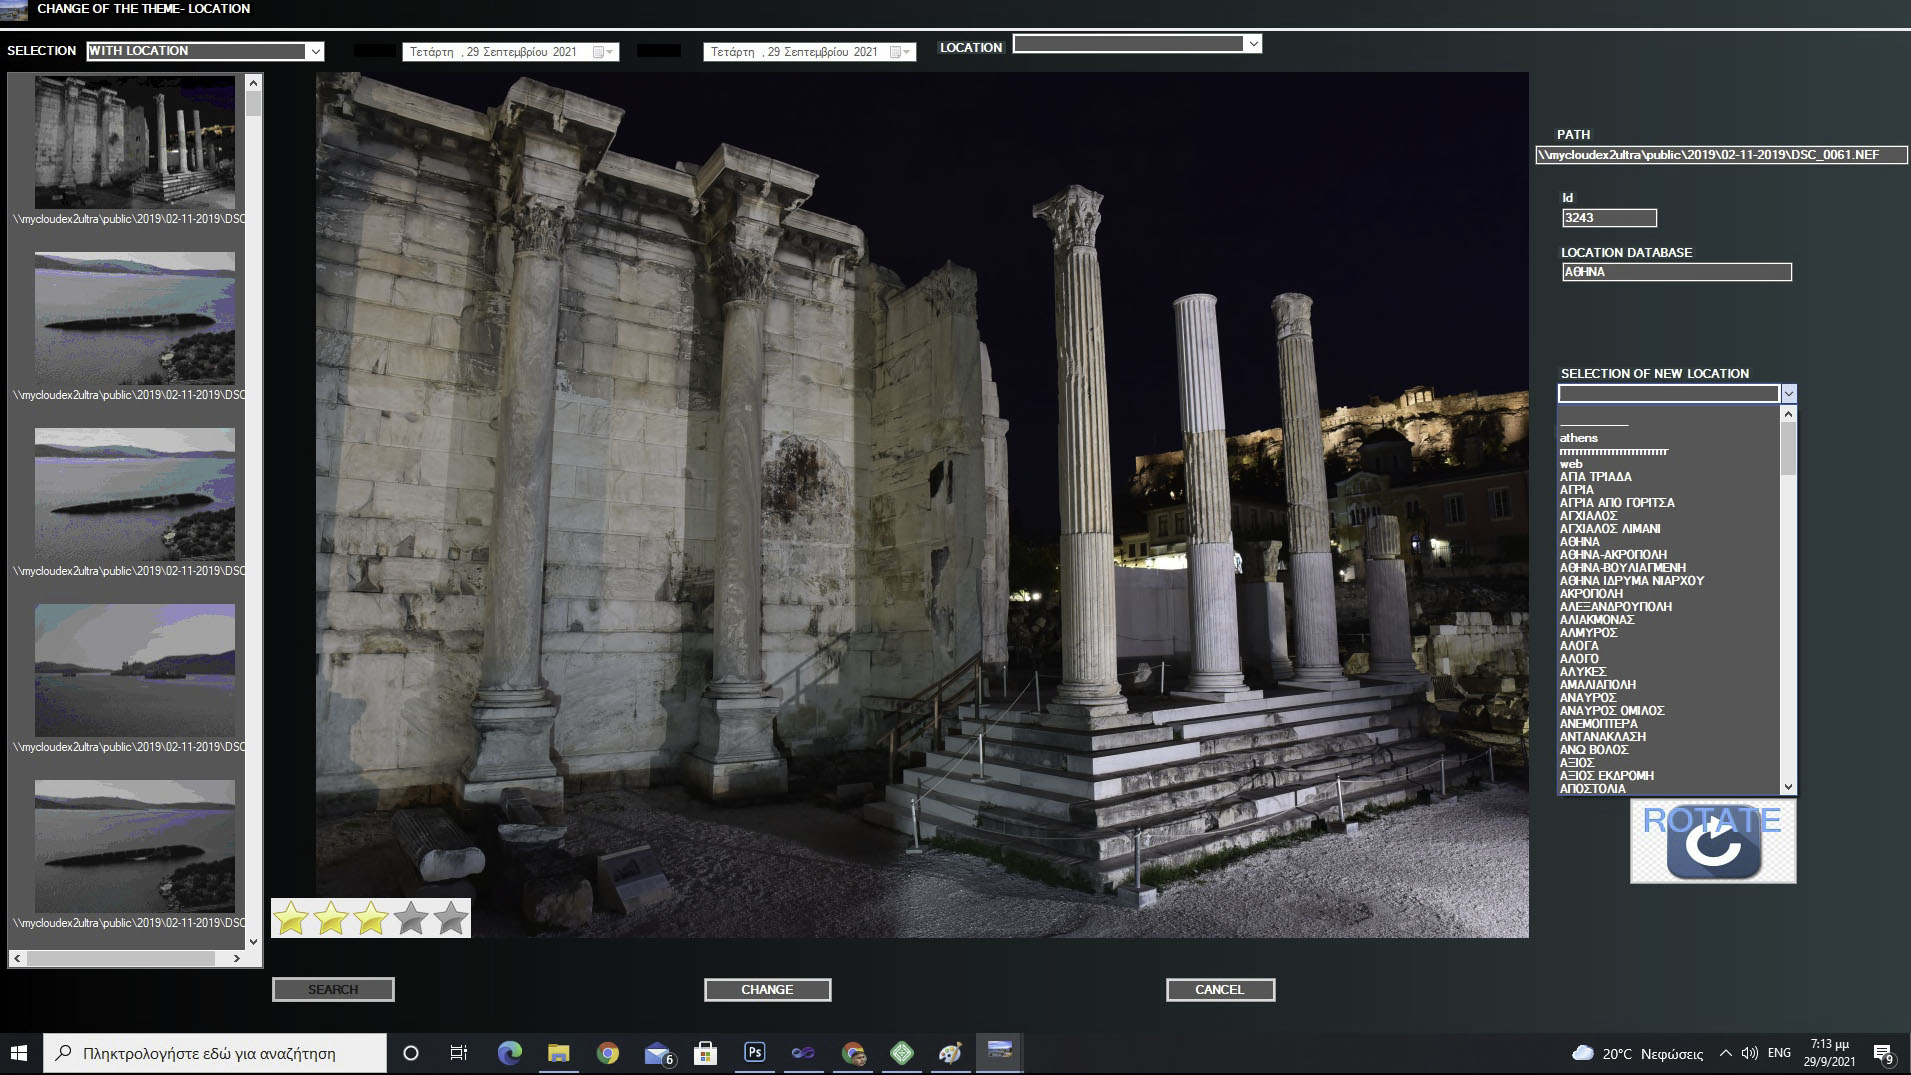
27. CHANGE OF THE ΤΗΕΜΕ- LOCATION AND RATING
select from the drop-down list SELECTION OF NEW LOCATION new location topic or write the new one, and change the rating and press GHANGE..
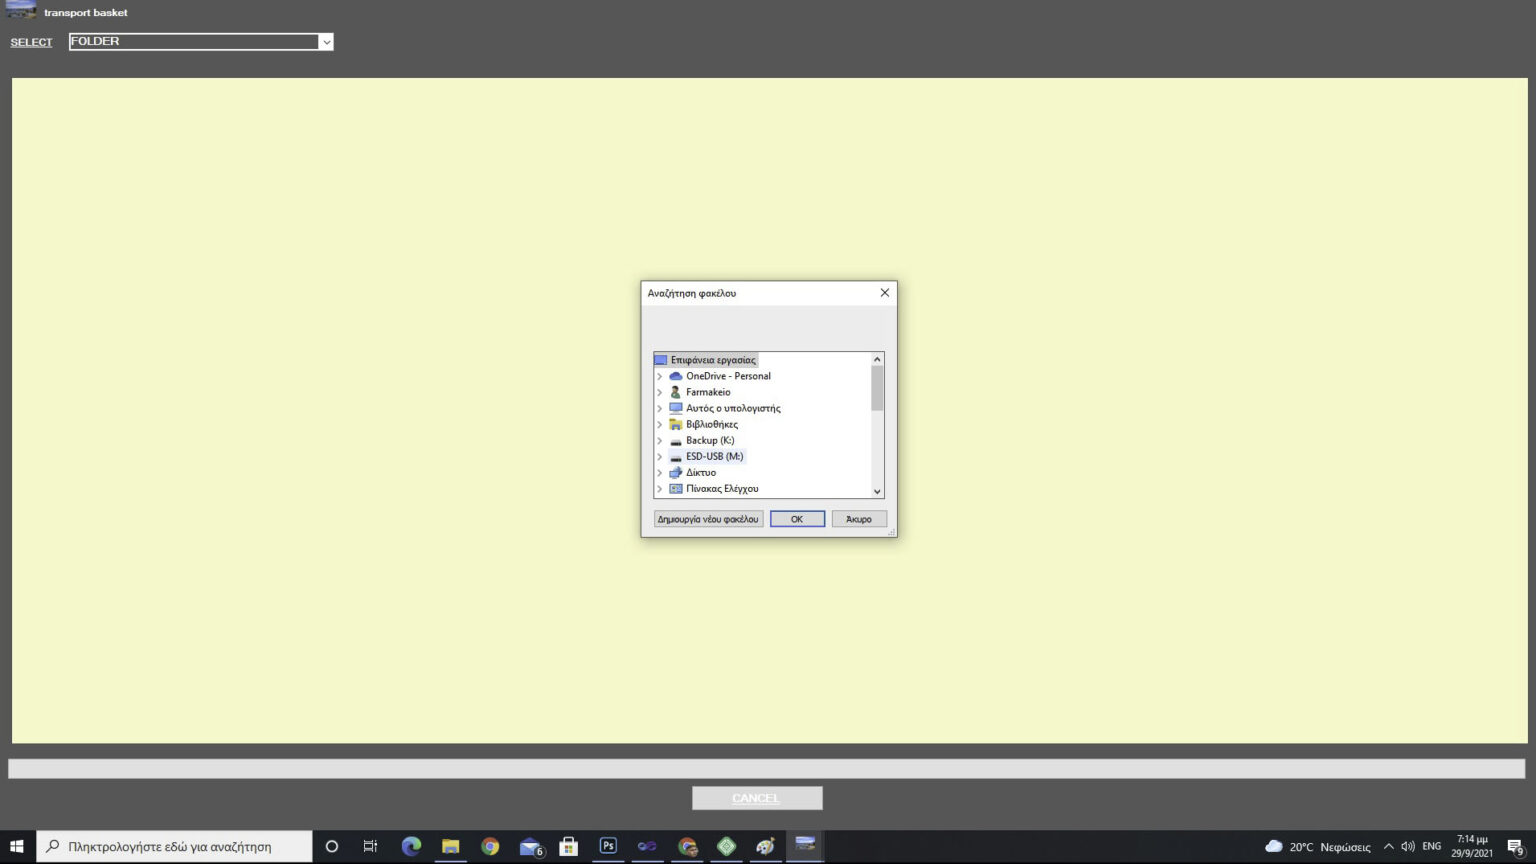
28. transport basket
By selecting FOLDER from the drop-down menu, we select a display list on the screen.
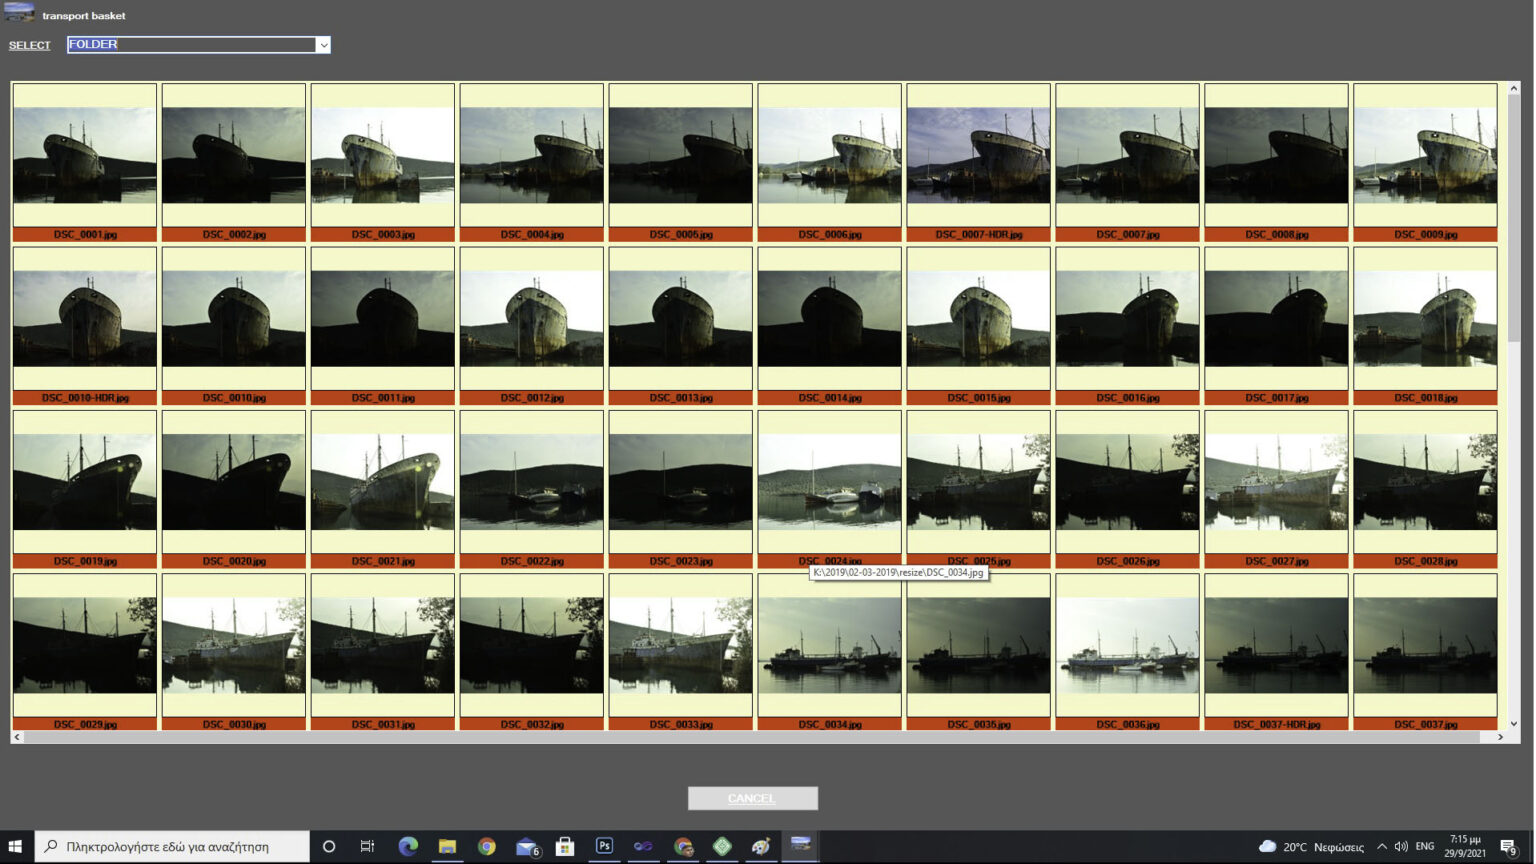
29. transport basket
By pressing the PRESENT AND SELECTION key we go to the screen for presenting and selecting photos from the folder
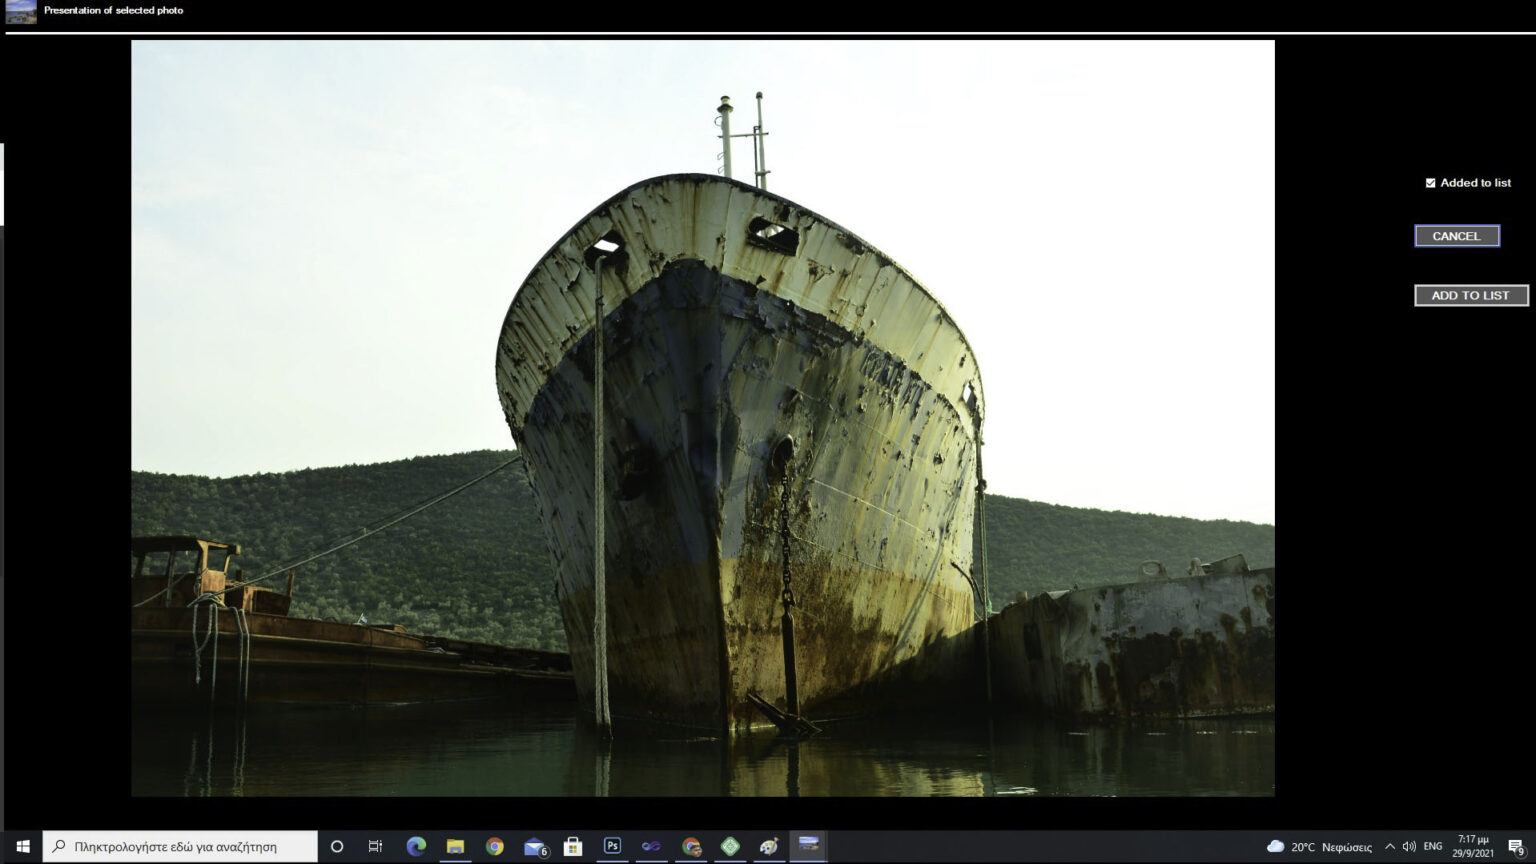
30. transport basket
In the new window by checking ADDED TO LIST and pressing the ADD TO LIST key you save the photo in a list for saving to another storage medium. By unchecking the ADD TO LIST button you become SAVE and by pressing it it registers all the photos of the list in the medium that we will choose
31. ORGANIZATION SETTING FORM
Selecting the Organization option from the menu takes you to the screen above. Here you can automatically sort the photos per year, month and date in a folder. Useful tool for the initial configuration of the photo folder as well as in case change of storage medium. If we have network disks, select the add network disk option. In the Create a folder photo option we select the disk where the photos will be sorted. In the Folder name we give the name of the folder we want. In the next two options we give the minimum width and height of the photos we want. In the next option we give the minimum size in KB of the photos that will be registered. in the last option from the folding list select the file type or all types of photo files and click Save setting
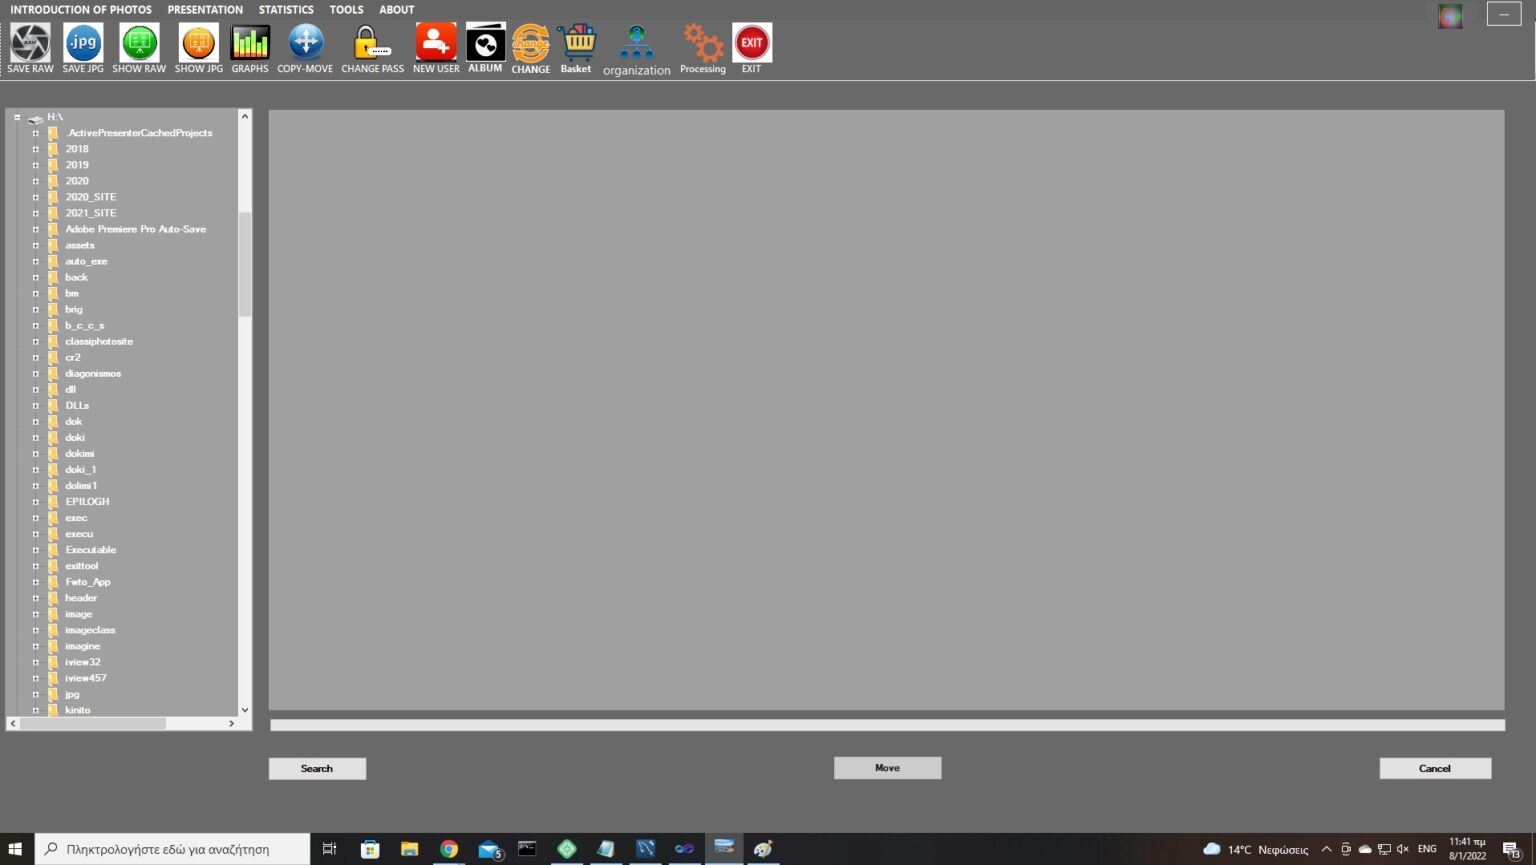
32. ORGANIZATION SELECT
Select the folder to be transferred and click Search. Once the photos are displayed, press Move and the transfer to the new folder will start with year, month, date sorting. If we want he can register the routes in the database and then we can add location - topic and evaluation
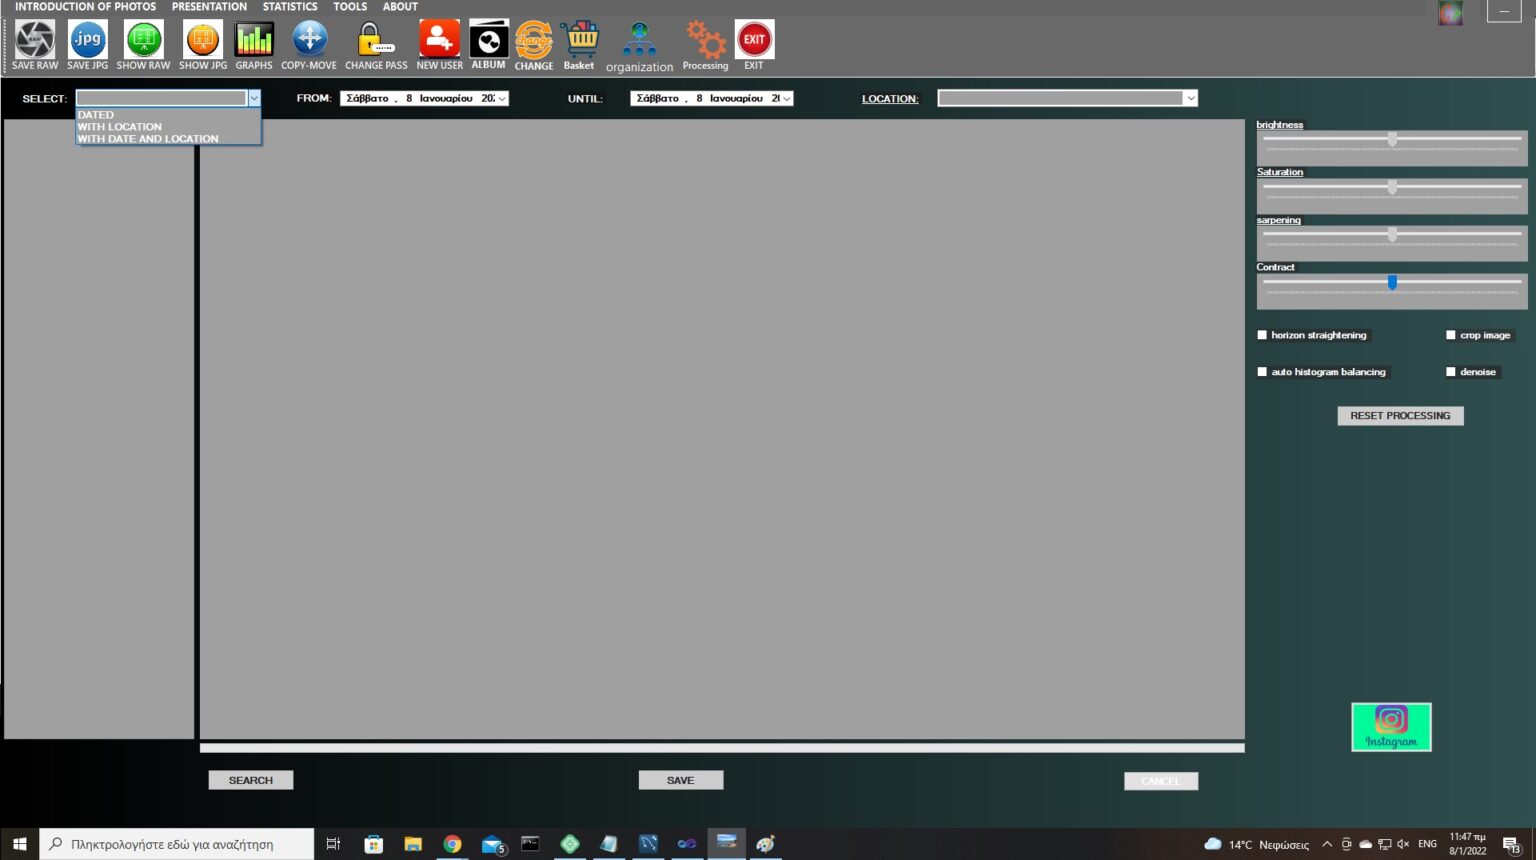
33. PROCESSING PHOTOS
Select the photos we want from the drop-down menu and double-click on the thumbnail to display the photo
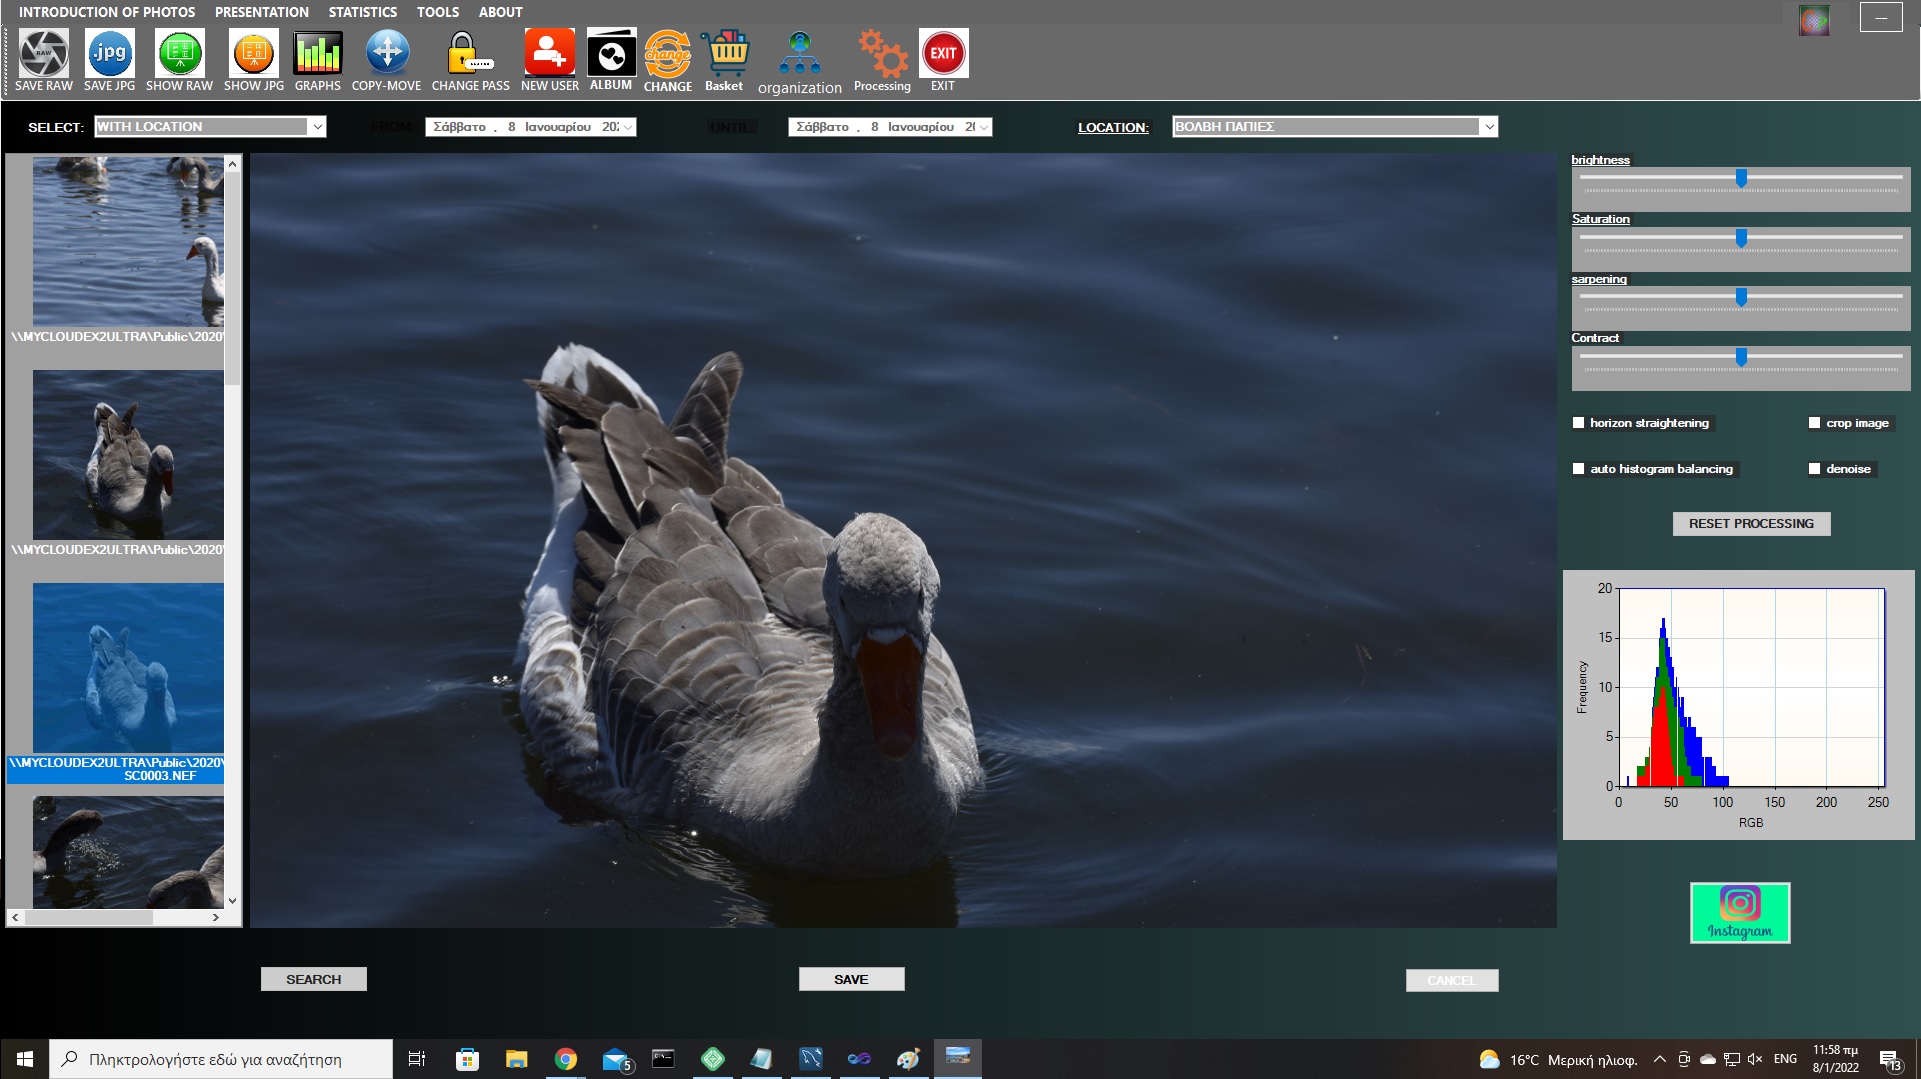
34. PROCESSING PHOTOS
On this screen you give us the ability to edit the photo in brightness, color body and sharpness. We can also crop the photo to flatten the horizon to noise as well as to balance its histogram.
35. UPDATE PROGRAM
At startup the program automatically checks for new updates and informs the user about their installation